
Learning how to use scissors with ease and accuracy is a really important lesson for children. In this post, I have collated my ten most favorite ways to practice scissor skills. These activities are all super easy to put together and are lots of fun for kids to practice and master.
You will only require 3 materials for each of these activities! Yep 3, that’s all!
1 Scissors: We like to use specialized children’s scissors (with a metal blade) for cutting and snipping. These scissors are readily available at craft, department and stationary stores. The neat thing about children’s scissors is that they have a safety blade and a blunt tip, which protect little fingers from getting hurt. They’re also light in weight and the correct size for little hands. Big, heavy scissors are going to be difficult for children to manoeuver and control. I suggest avoiding plastic scissors, as they often don’t actually cut the paper. This frustrates children and discourages them from practicing and mastering their scissors skills. It is ultimately up to you though, which scissors you feel comfortable allowing your children to use.
2 Paper: You can use any paper that you like for your cutting and snipping activities. In most of the activities that I present in this article, I have used off cuts and scraps of colored paper. When possible, I also try to use a light cardstock. It’s a little bit heavier than paper, so it doesn’t flop around as much, making it easier for children to hold.
3 Marker pen: I use a black marker pen to mark the lines on the paper pieces. Start by marking long solid lines for your children to follow with scissors. Once your child has mastered following the solid lines, you can move to dotted or dashed lines to increase the difficulty.
!WARNING! Before presenting the activities, it is important to remember that scissors are sharp! It is always a great idea to remind children at the beginning of each lesson or activity that scissors can be dangerous when not used correctly. And of course, adults should always closely supervise children when using scissors.
Here are a couple of rules that I like to remind my kids before using scissors:
- Scissors are for cutting paper only – not clothing, hair or fingers!
- Encourage small snipping movements where your child moves the paper around the scissors, not big clunky movements.
- And of course scissors should always point away from the body and only be used while stationary. Children shouldn’t walk around with scissors. If they must, remind children to secure the blades within the palms of their hands and to pass them via the handles.
You might have your own house rules for using scissors that you would like to add to your own scissor safety list.
Using scissors is tricky, so don’t worry if your child’s work appears messy at first. Your child will progress at their own pace. By preparing fun and colorful activities for them, they will be happy to practice and get better and better.
Here is the list of my 10 most favourite activities for increasing scissor skills.
1. Beginner scissor pattern with sticky marker dots: I love this super easy to set up scissor practice activity. These are off cuts of colored paper that I had at home. I drew different shaped lines on them with marker pen and then labelled with sticker dots to show where little fingers need to be positioned for safe cutting. If you do not have sticker dots, you can simply draw the dots with marker pen. That will work just as well! Just remember that some of the lines shown, such as the swirly line, can be quite difficult to cut for beginners. Practise straight lines first and then introduce harder lines to follow and cut.

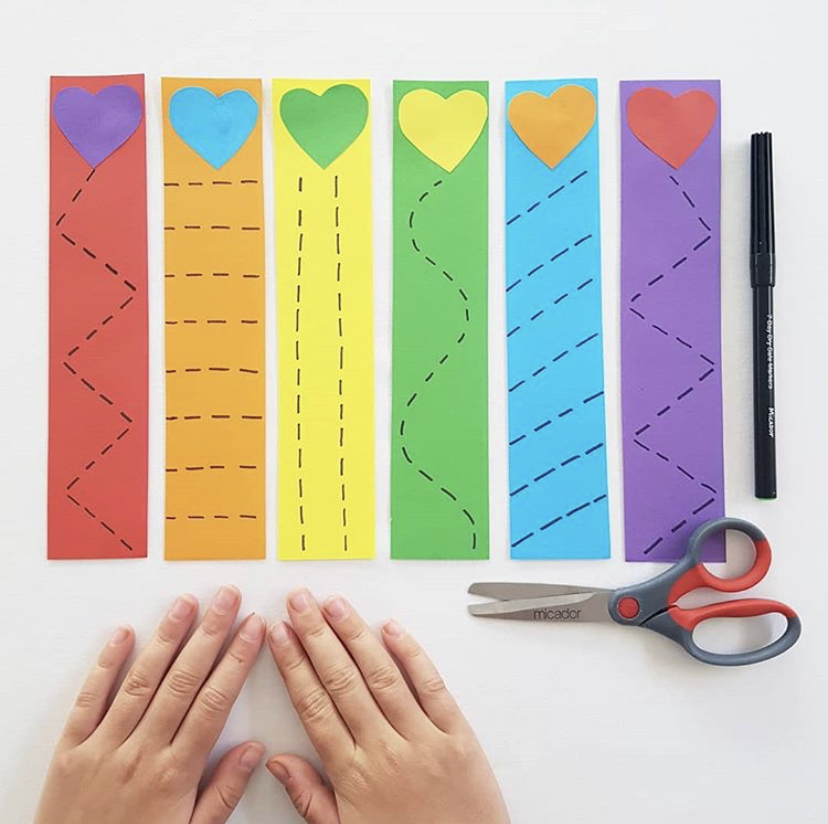
2. Trace and cut patterns: I love that you set this activity up once, but two skills are learned and practiced! To play simply draw out some dashed line patterns onto strips of paper. Then ask your child to trace the lines. You will see that I added the hearts to one side of the paper. This gives the activity direction. You can trace towards the hearts or away – whatever direction your child chooses. Tracing lines is a great pre-writing skill and helps strengthen the little muscles in your child’s fingers. Once the lines have been traced, ask your child to cut along the lines. It’s lots of fun!
3. Advanced cutting activities: Once your child has mastered snipping and cutting in a straight line, you can move to more difficult cutting patterns. These activities are just as simple to set up! For more advanced cutting activities you will just have to think of more challenging lines for your child to cut along. Think curved and zig-zag lines, and even intersecting lines. These activities will not only challenge scissor skills but will also challenge their strategic and creative thinking skills.

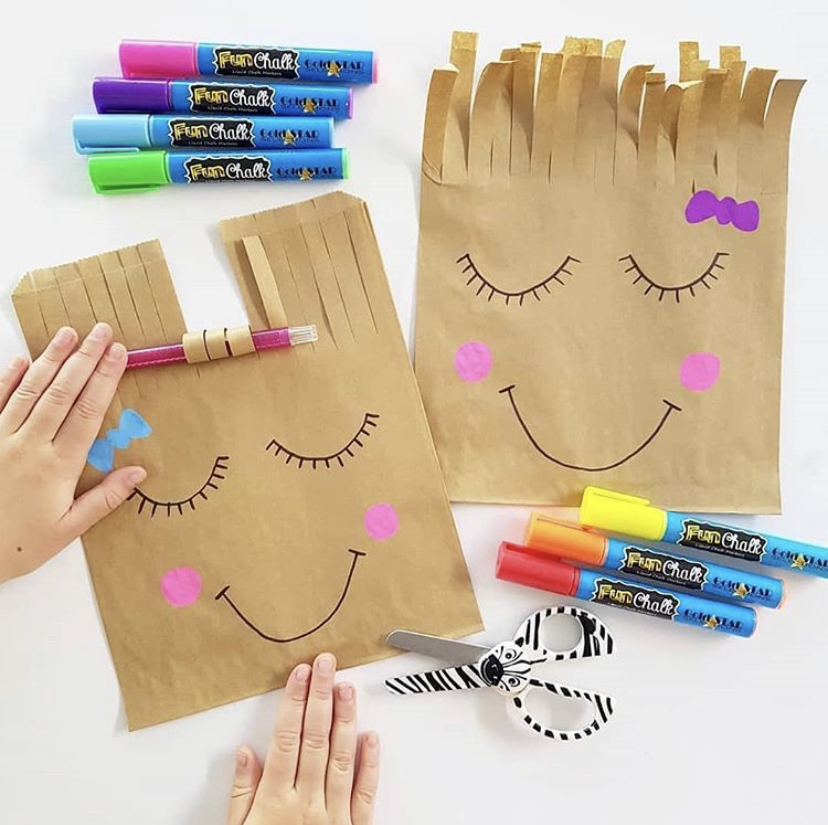
4. Paper bag haircuts: this activity also doubles as a fun art and craft activity and is a cute way to decorate a simple brown paper lunch bag. Start by decorating the front of the paper bag with a cute smiley face. Then take your scissors and snip some hair across the top of the bag. Your child can either cut through the two layers of the bag together or individually. Let them think about the best strategy to successfully make the cuts.
5. Cutting with direction: For this activity, simply draw some patterns on scraps of paper with marker pens and then give the lines direction by adding little arrow heads at the end of the lines. Then ask you children to cut the lines in the direction that the arrow is pointing. You can draw straight lines for beginners and curved lines and even circles for older children with more developed scissor skills.

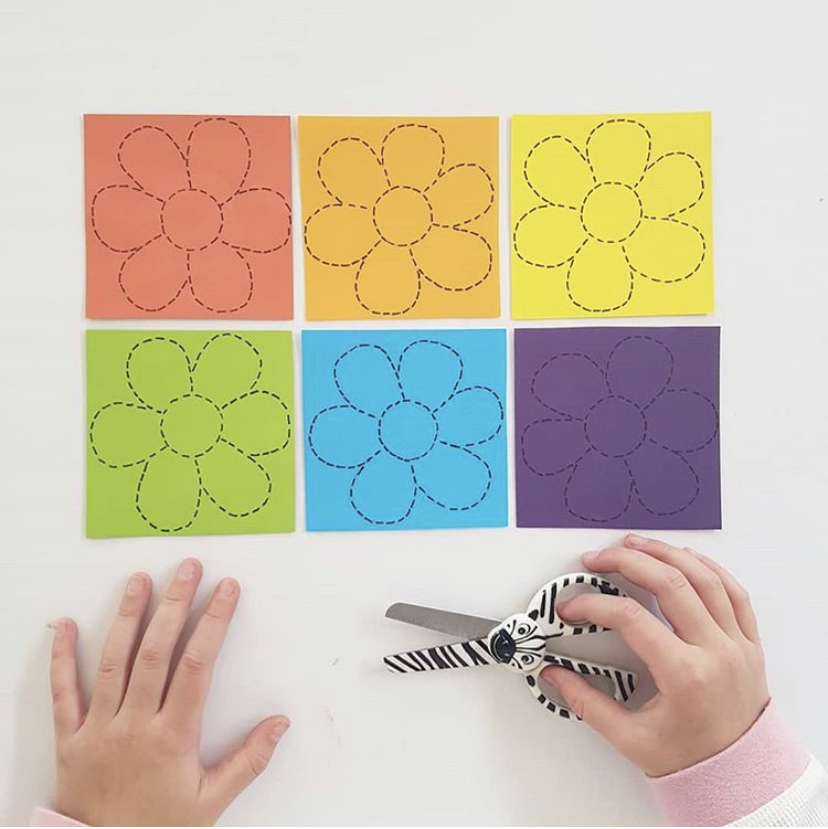
6. Spring time trace and cut: you can always theme your cutting activities to your child’s interests! To make this flowery activity, draw some flowers onto squares or paper. You can then either cut along these lines directly, or ask your child to trace over the lines before cutting. Again, tracing along the lines is great pre-writing practice. As I mentioned above, cutting the curved lines can be tricky, so make sure that you work up to this activity. You do not want your child getting frustrated or disappointed if the activity is way too difficult for them.
7. Meet in the middle: this scissor skill lesson is a great collaborative activity that we like to call “meet in the middle.” It’s perfect for siblings and small groups in the classroom. To play, we taped strips of colored paper together, ruled cutting lines and marked the midline with a star shaped sticker – again, if you don’t have stickers, mark the middle with marker pen. Then use your scissors to cut along the ruled lines and “meet in the middle.” Remember that this activity is not a race! It’s about cutting accurately along the straight lines and stopping once you reach the midline.

8. Curly rainbows: this is one of my most favorite Instagram posts ever! As well as providing a lovely scissor practice opportunity, it also results in a beautiful, happy art piece. To put this activity together, simply draw some clouds on a piece of white paper and ask your child to cut around the outline with scissors. Then ask them to cut strips of colored paper. Tape the strips to the back and draw smiley faces onto the clouds. You can either stop there, or if you want some extra fine motor skill practice, curl the paper around a pencil!

9. Cutting shapes: this activity has direction and requires a little more concentration than snipping short straight lines. It also provides a great opportunity to introduce shape and some early geometry principals. To put this activity together, simply cut the shapes from some colored paper. Then draw the lines with marker pen and add some little direction arrows. Finally, ask your children or students to cut along the line. This one is actually quite fun!

10. Cutting puzzles: I love it when you set up an activity that can be used over and over again. This was actually an activity that I put together for my girls in the lead up to Easter, but you could just as easily turn it into a dinosaur egg game and it use it year round. To play, I simply cut out the egg shapes, drew lines on them with marker pen and asked my girls to cut along the lines. We then kept the pieces and used them as puzzles! You can store the pieces in an envelope or bag and then play with them as often as you like.

Here is a FREE printable summary of this article!
What are your favorite ways to practice scissor skills? Have you tried any of these activities?

Thank you so much for reading! If you have any questions pop them in the comments below and I will get back to you. Jacinta Xx

