We LOVE practicing our scissor skills and this activity is one of the most fun and easy ways for kids to develop their fine motor and scissor snipping accuracy. You will only need some colored paper, a glue stick and a marker pen for this activity. And, if you don’t have time to put one of these rainbows together for yourself, scroll down for my free printable version.
Advertisements
This is what you will need:
Colored construction paper
White printer paper
Scissors
Black marker pen
Advertisements
This is what you will need to do:
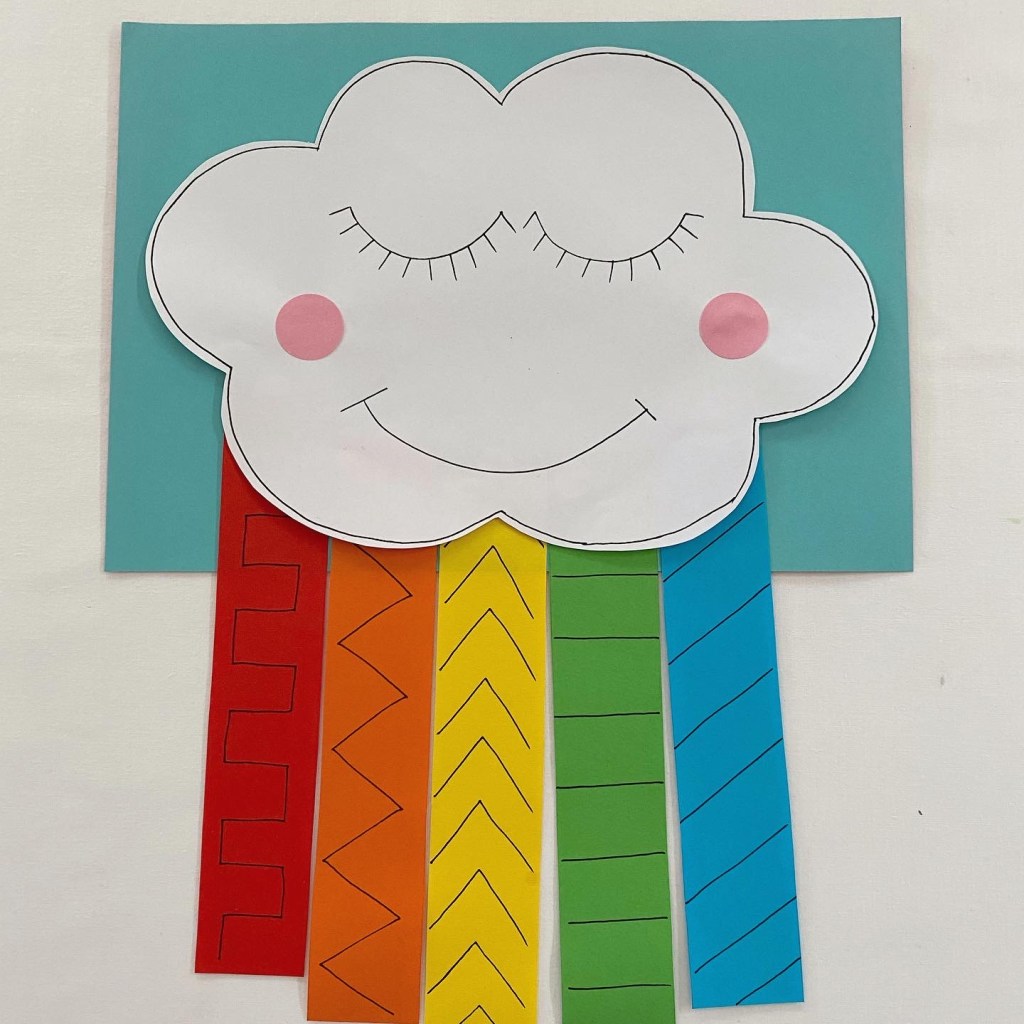
1. Cut a cloud shape from a piece of white paper. Cut strips of colored construction paper and attach them to the back of the cloud. You can use a glue stick or tape to attach your colored strips.
Advertisements
2. Take your marker pen and add some different line patterns to each strip of paper.
Advertisements
3. Take your scissors and carefully snip along the lines on the colored strips.
!WARNING! Remember that scissors are sharp. Always be very careful when using scissors and remember that adult supervision is always required when children are using scissors!
Advertisements
Here is your FREE printable version of the activity:
It feels a little strange writing this blog post about fall activities as it’s actually spring here in Melbourne. In fact, it’s a lovely sunny day! I do love Fall crafts though, especially ones I see coming out of the northern hemisphere where the falling leaves are beautiful reds and orange in color. Where we live, the leaves obviously fall, but we don’t really get the vibrant color changes. Mostly just green to brown!
We have tried a few fall crafts over the years, but this one was really fun! I do want to point out that it does require single use plastic bags – which from an environmental view – we hate using. To make the activity worthwhile, we added quite a bit of paint to each bag, so that it didn’t dry out and we could play longer, and we ensured that once we had finished with the bags, we disposed of them carefully. And you could always wash the bags out and reuse them again too if you like!
And please read through right to the end of post to find some fun FREE fall printables!
Advertisements
This is what you will need:
Leaves
Zip-lock bags
Black marker pen
Paint
Advertisements
This is what you will need to do:
1. Head outside to collect some leaves. Remember to always watch for car and bicycle traffic when you are walking your neighborhood, and make sure that adults accompany children at all times.
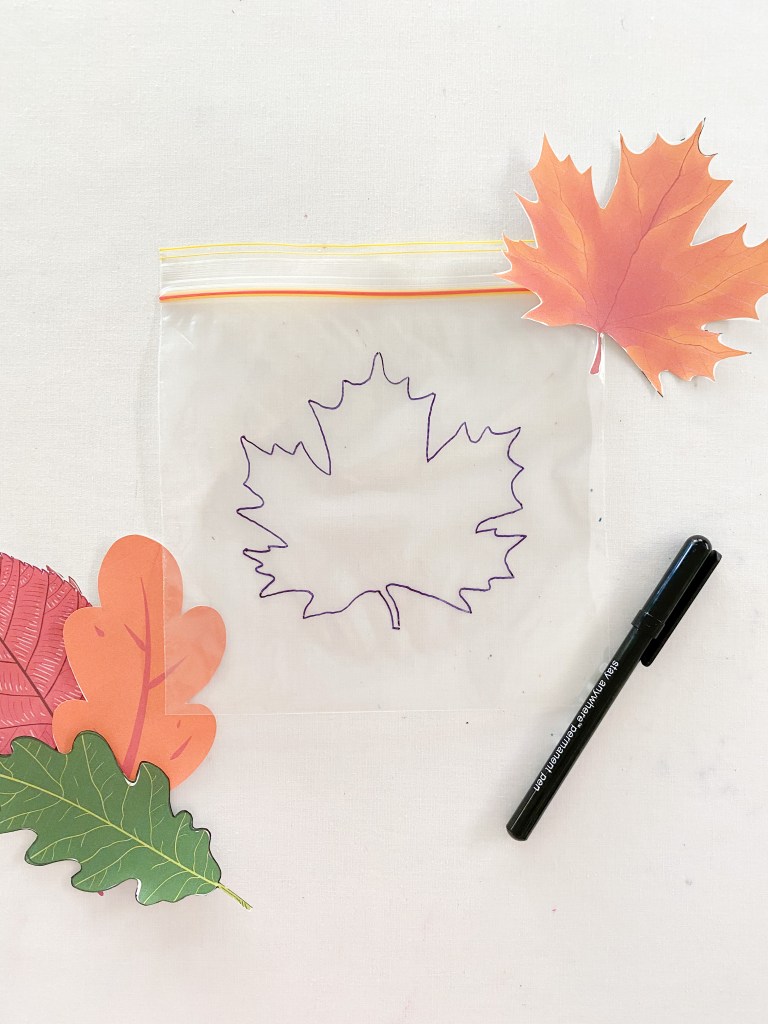
2. Trace the leaves onto the zip-lock bags with marker pen. You will have to make sure that you collect leaves that are slightly smaller than your bags. And if you can’t find any leaves that you LOVE, you could print some paper ones like we did!
Advertisements
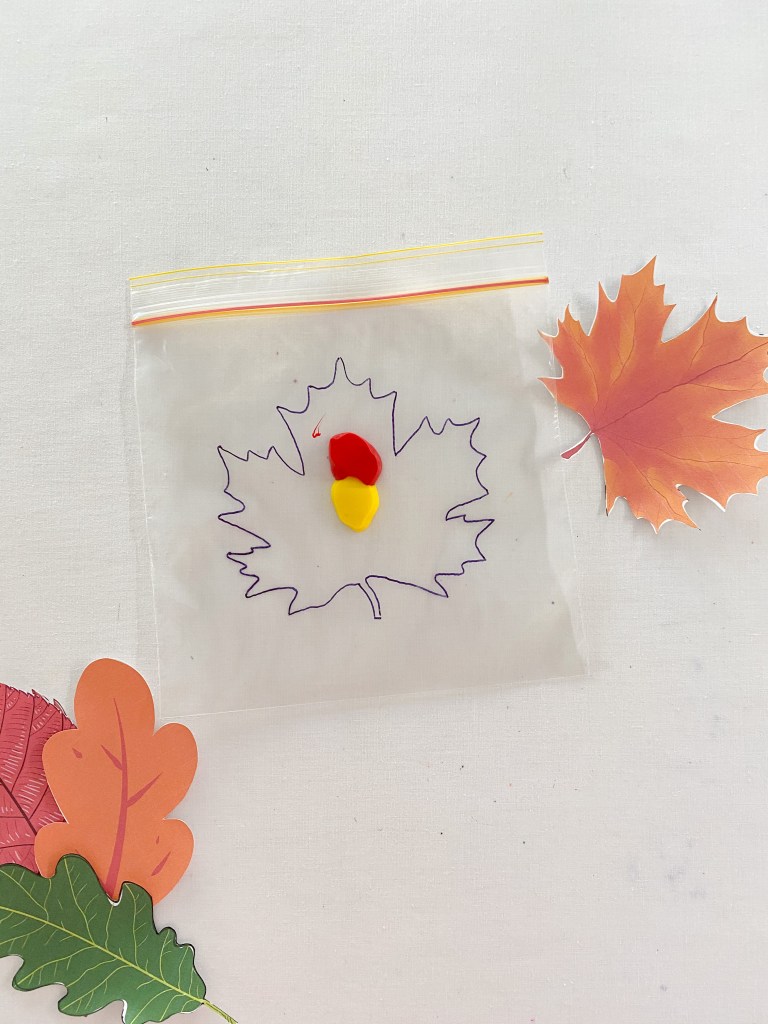
3. Then add some paint to your bags. I wanted to make our activity a color mixing activity as well as a fine motor activity, so we added two colors to each bag.
4. Once the paint is in the bag, you might like to tape the bag closed to secure. The last thing you want is little people opening the bags and spilling paint everywhere. My girls are older now and know not to open the bags, so I haven’t taped these ones!
I definitely recommend taping the bags though and supervising carefully throughout the activity to avoid any paint spills and damage to clothing and furniture.
Advertisements
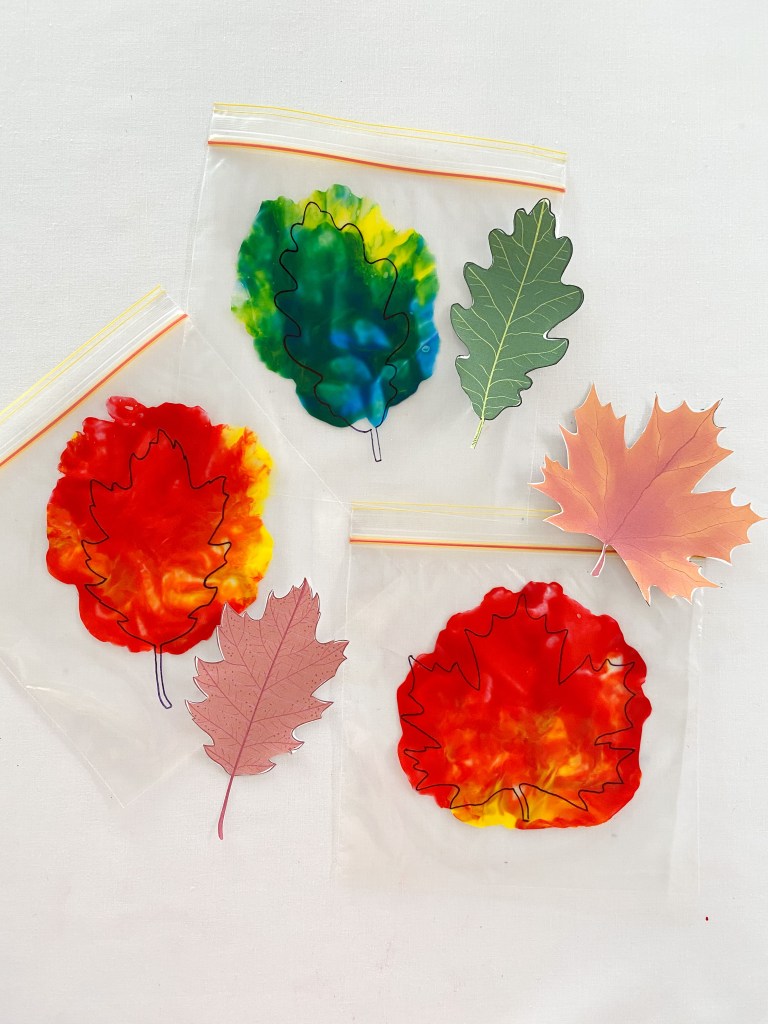
5. Once the paint is safely in the bag, squish it with your fingers. The idea is to both mix the colors together and keep the paint within the outlines of the leaves. This can be a little tricky for small children, especially when you are trying to mix the color evenly at the same time! See how you go!
Advertisements
My girls really love this type of activity, and I love it because it’s relatively mess free! They get to use paint, which they really enjoy, and the paint stays in the bag for a quick and easy clean up!
Advertisements
Have you seen this craft on my Instagram? These are leaves that we collected from our neighbors oak tree and colored with oil pastels. It looks much better over on Insta, but this is fun too if you are looking for a quick prep activity!
Advertisements
Advertisements
And I nearly forgot to include these FREE printables! Enjoy! Jacinta Xx.
We have made a couple of Lion crafts over the last few years. The first was when we painted a paper plate and then attached strips of yellow and orange paper hair (picture in the middle in the above panel). Cutting the strips of paper to attach as the hair was a great way to practice scissor skills! We also rolled the paper around a pencil to curl it – another fun way to strengthen little fingers and develop fine motor skills.
Next, we gave the adorable lions that we had made a hair cut to practice our scissor skills some more (right picture above). We started by cutting off the curls with scissors and then snipping a fringe pattern around the plate. It’s a little hard to see – you may need to zoom in.
And then just yesterday we made these Lacing Lions (pictured on the left)! This activity is a great way to practice fine motor skills and pincer grip, and to introduce some easy sewing techniques.
These lacing lions are so easy to put together. They are made from a piece of recycled card, and the really neat thing is that once you have made the lion, you can lace the yarn over and over again.
Keep reading to see how we made these Lacing Lions!
This is what you will need:
A piece of recycled card
Yellow paint (I used acrylic paint)
Paintbrush
Pencil
Black marker pen
Bamboo skewer
Orange or yellow yarn
Plastic sewing needle
This is what you will need to do:
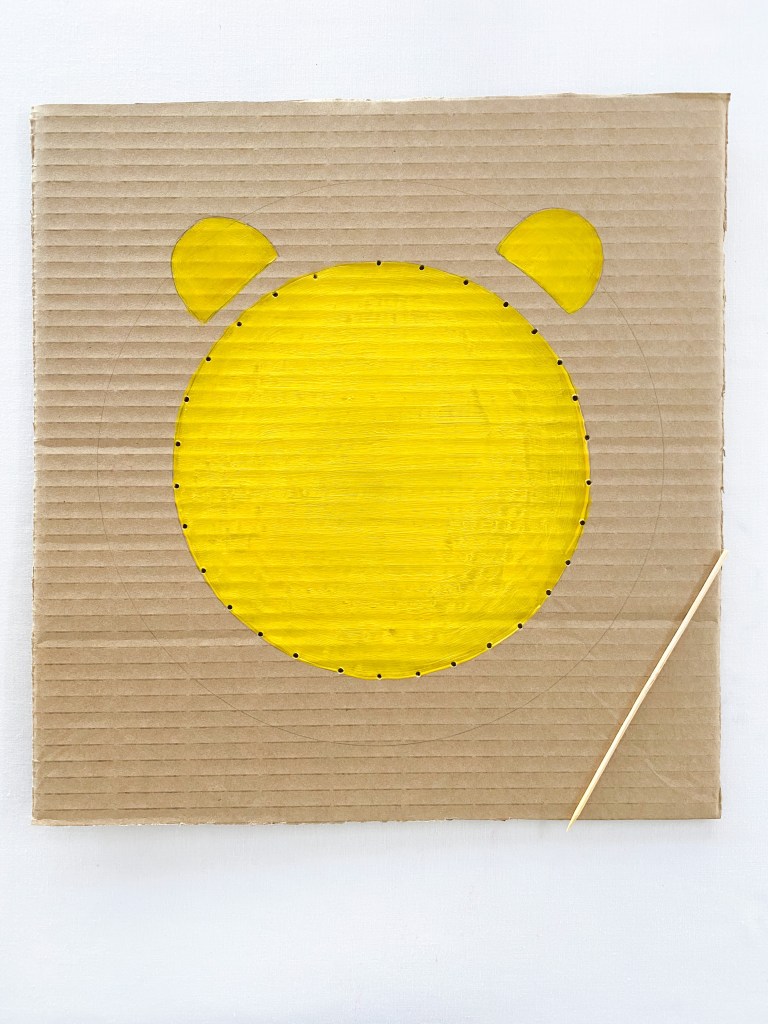
1. Trace a circle in the middle of your card with pencil. You might like to trace a small plate or bowl to get a nice even circle shape. Once you are happy with your circle shape, paint it yellow and add some ears. Allow the paint to dry completely.
2. Next, take your bamboo skewer and press holes around the edge of the circle. Remember that the bamboo skewers are sharp. An adult will need to do this step.
3. Trace a second larger circle around your painted circle with pencil.
4. Take your bamboo skewer again and very carefully press holes through the card along the second pencil line. The trick with this step is to make sure that you match the holes up with those on the smaller circles so that they are in pairs. (remember that the bamboo skewers are sharp. Please use them carefully!).
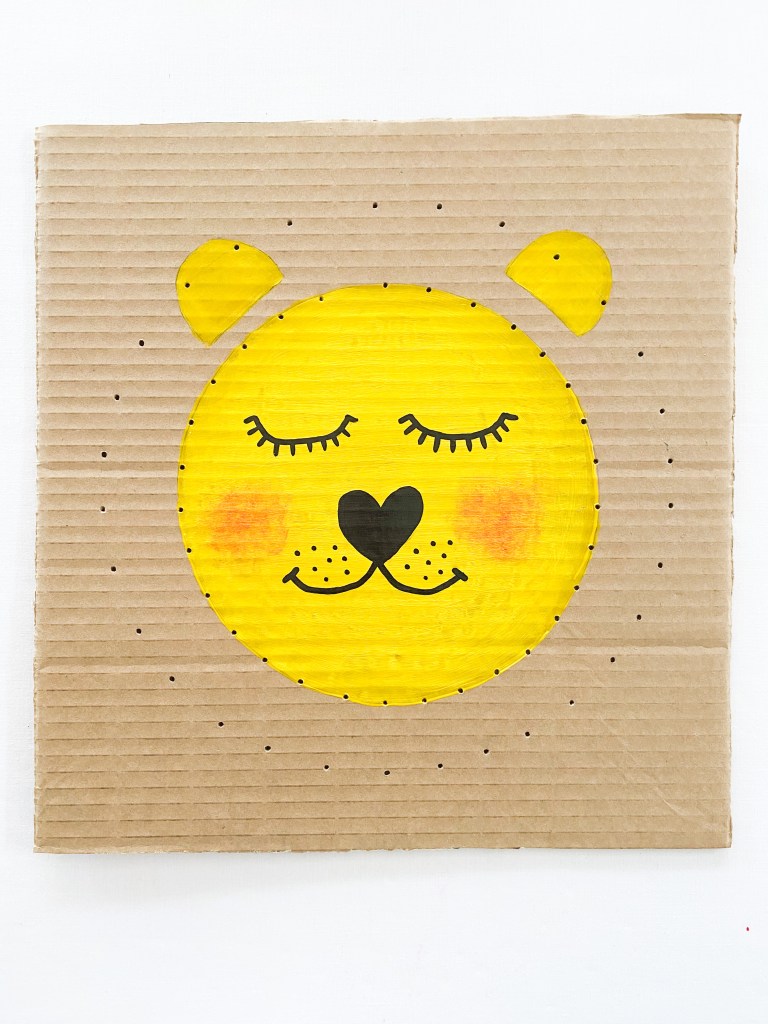
5. Decorate the face of your lion. We drew eyes, a nose and mouth with black marker pen and then used a little bit of water colour paint to give red, rosy cheeks.
6. Start lacing! To do this, thread some orange yarn onto a plastic needle and start pushing the needle through the holes in the card.
7. At this point, I felt as though our lion looked a little bit more like a sun than a lion! ha ha!
8. So I used the bamboo skewer to add more holes around the edge of the lion and we added more layers of yarn.
This is how the finished lion looked!
Here is a quick video of how we made these Lions.
Thank you so much for reading all the way down to the end of this article. Let me know what you think in the comments below. Jacinta Xx
And here is a free lion template for you to practice your fine motor and scissor skills!