We LOVE practicing our scissor skills and this activity is one of the most fun and easy ways for kids to develop their fine motor and scissor snipping accuracy. You will only need some colored paper, a glue stick and a marker pen for this activity. And, if you don’t have time to put one of these rainbows together for yourself, scroll down for my free printable version.
Advertisements
This is what you will need:
Colored construction paper
White printer paper
Scissors
Black marker pen
Advertisements
This is what you will need to do:
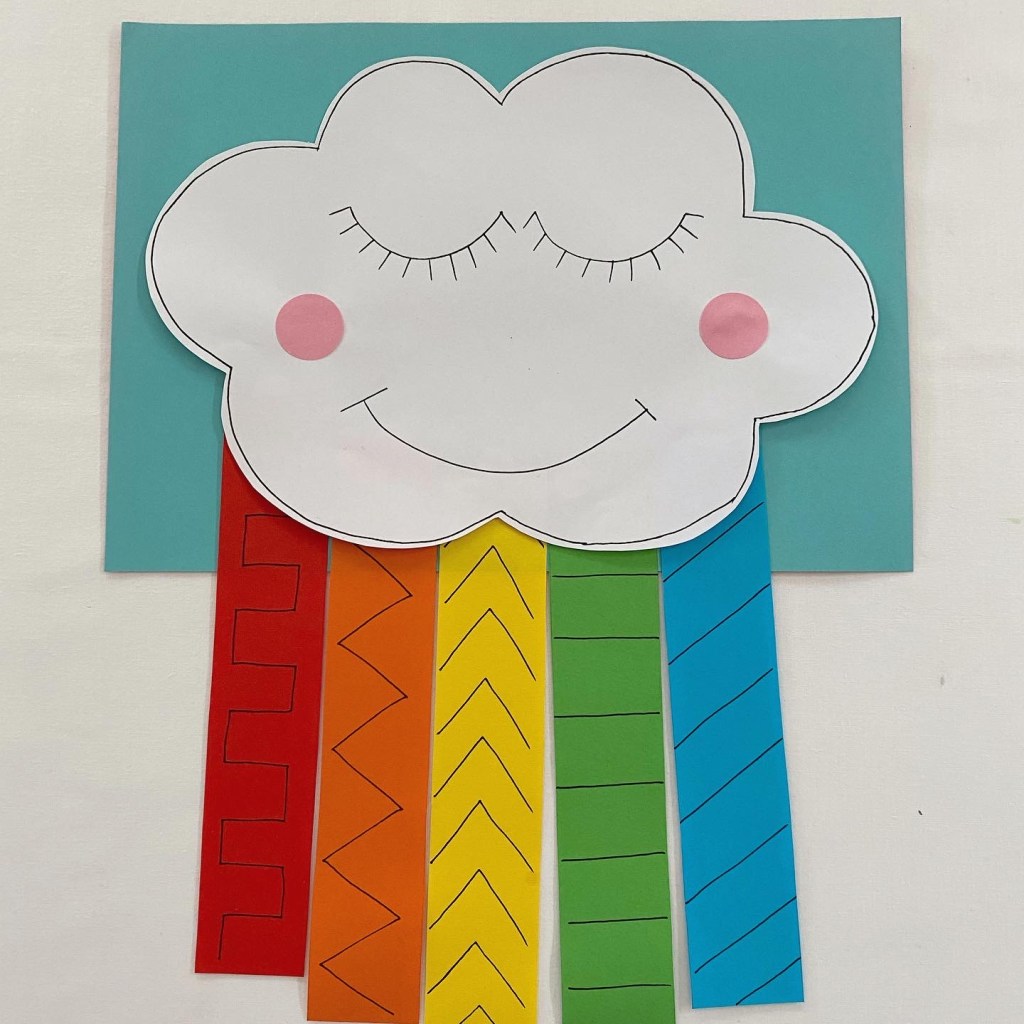
1. Cut a cloud shape from a piece of white paper. Cut strips of colored construction paper and attach them to the back of the cloud. You can use a glue stick or tape to attach your colored strips.
Advertisements
2. Take your marker pen and add some different line patterns to each strip of paper.
Advertisements
3. Take your scissors and carefully snip along the lines on the colored strips.
!WARNING! Remember that scissors are sharp. Always be very careful when using scissors and remember that adult supervision is always required when children are using scissors!
Advertisements
Here is your FREE printable version of the activity:
Time has gotten away from me lately! I have hardly had a chance to blog. I actually made these fun printable math worksheets at Easter time, but have not had a second to myself to sit down and publish them.
Advertisements
These early math worksheets are perfect for preschoolers and are a great way to help them learn about and develop number recognition, one-to-one correspondence and subitising skills. Kids will also get a chance to work on their scissor skills as they enjoy this activity.
Advertisements
What you will need:
A copy of the FREE printable worksheets
Scissors
Glue
Advertisements
What you will need to do:
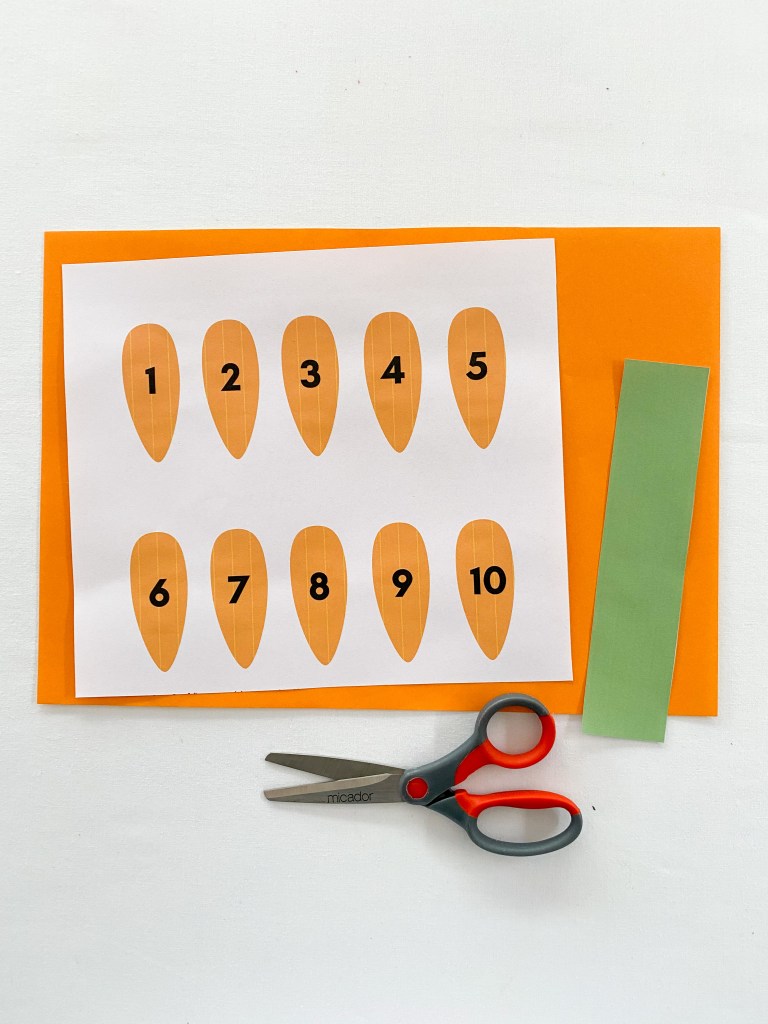
1. Print out the FREE Carrot Scissor Skills worksheet. The worksheet will look like this and you will find the free documents at the end of this page.
Advertisements
2. Take a pair of scissors and carefully cut around the green rectangle on the right hand side of the page.
!WARNING! Please remember that scissors are sharp. Adults should always carefully supervise children when they are holding and using scissors!
Advertisements
3. Use your scissors to snip the green rectangle into thin strips. These strips will form the leaves on your carrots.
Advertisements
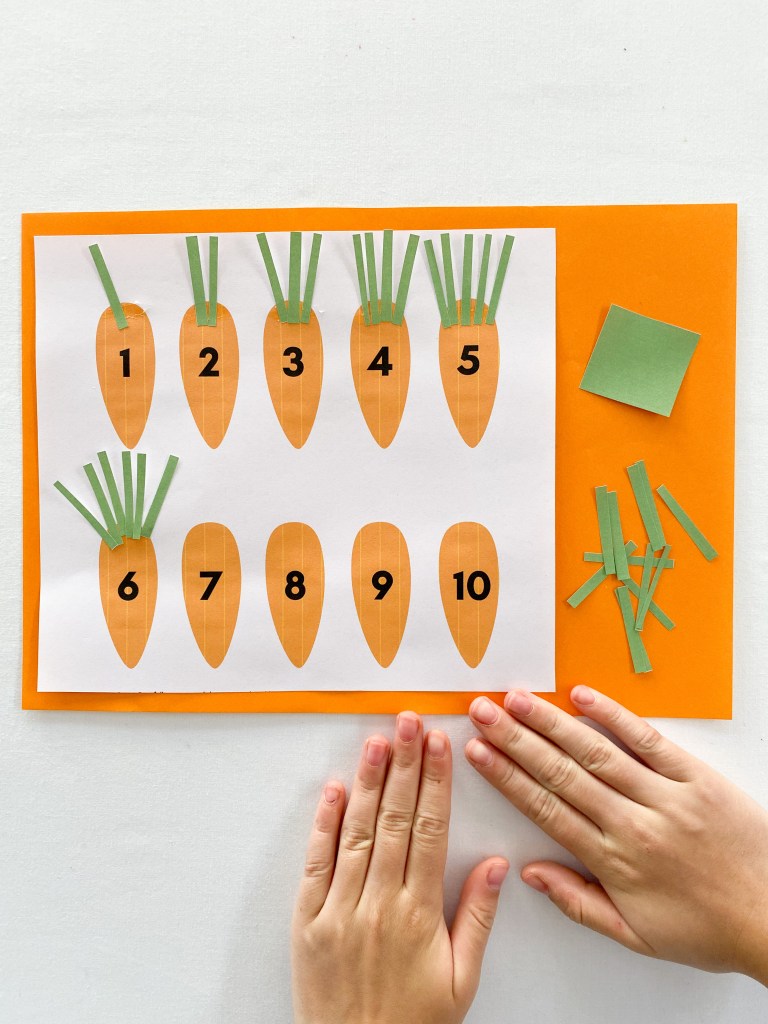
4. Glue the corresponding number of leaves onto each carrot. Allow the glue to dry.
Advertisements
For the second activity entitled “Carrot Number Math,”
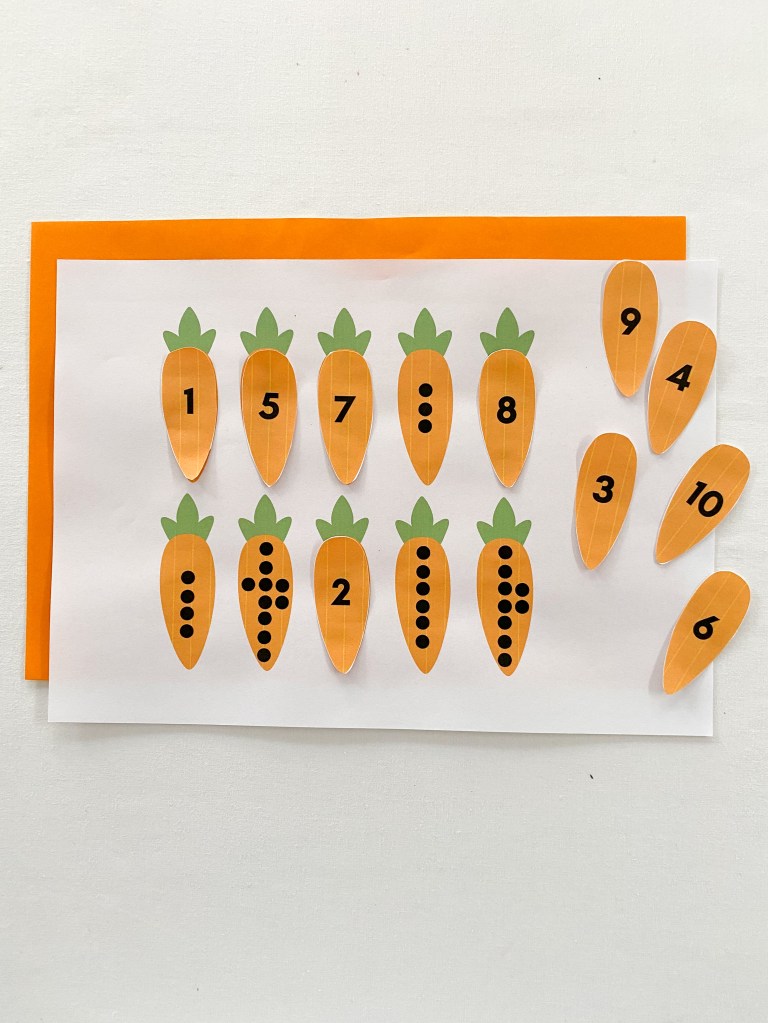
1. Print out the two page worksheet. You will find this FREE document below.
Advertisements
2. Use your scissors to carefully cut around each numbered carrot. Remember that scissors are sharp. Adults should always carefully supervise children when they are holding and using scissors!
Advertisements
3. Match the numbered carrots to the corresponding carrot on the worksheet. You might like to glue the carrots down, or just match them over and over again.
It feels a little strange writing this blog post about fall activities as it’s actually spring here in Melbourne. In fact, it’s a lovely sunny day! I do love Fall crafts though, especially ones I see coming out of the northern hemisphere where the falling leaves are beautiful reds and orange in color. Where we live, the leaves obviously fall, but we don’t really get the vibrant color changes. Mostly just green to brown!
We have tried a few fall crafts over the years, but this one was really fun! I do want to point out that it does require single use plastic bags – which from an environmental view – we hate using. To make the activity worthwhile, we added quite a bit of paint to each bag, so that it didn’t dry out and we could play longer, and we ensured that once we had finished with the bags, we disposed of them carefully. And you could always wash the bags out and reuse them again too if you like!
And please read through right to the end of post to find some fun FREE fall printables!
Advertisements
This is what you will need:
Leaves
Zip-lock bags
Black marker pen
Paint
Advertisements
This is what you will need to do:
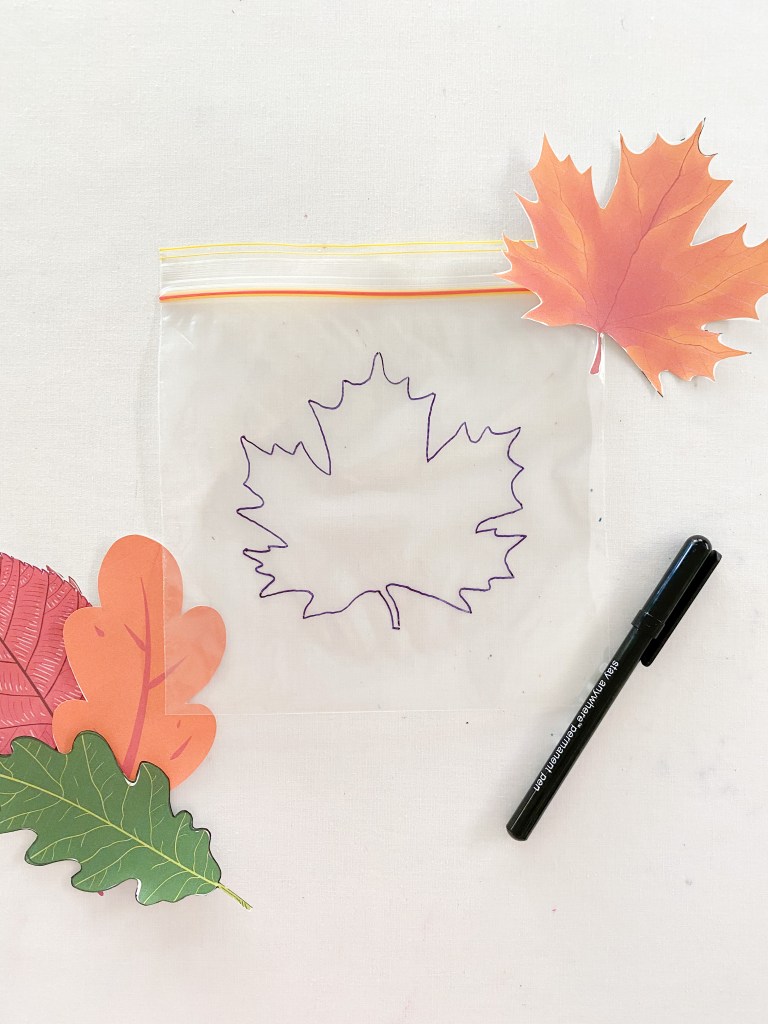
1. Head outside to collect some leaves. Remember to always watch for car and bicycle traffic when you are walking your neighborhood, and make sure that adults accompany children at all times.
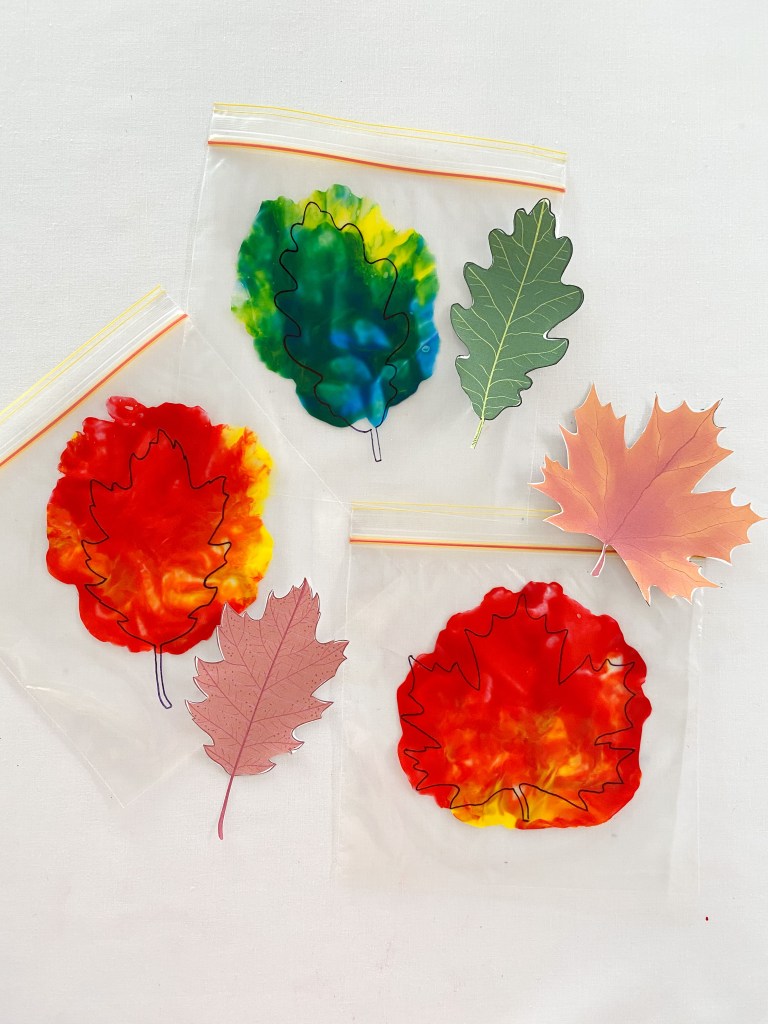
2. Trace the leaves onto the zip-lock bags with marker pen. You will have to make sure that you collect leaves that are slightly smaller than your bags. And if you can’t find any leaves that you LOVE, you could print some paper ones like we did!
Advertisements
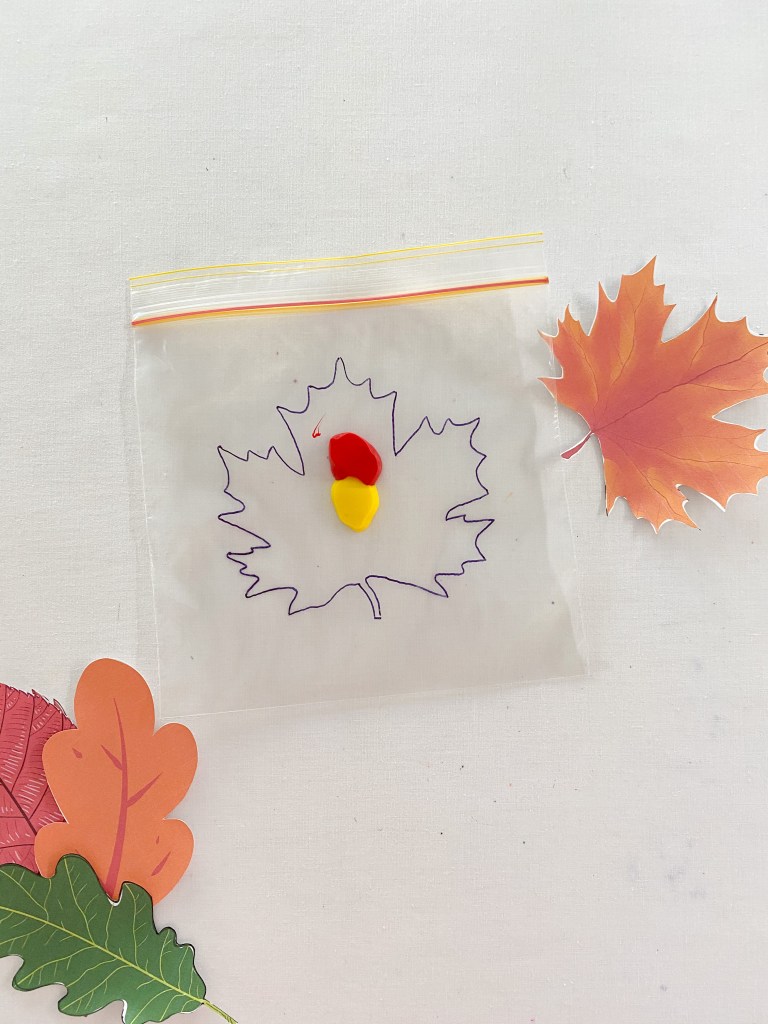
3. Then add some paint to your bags. I wanted to make our activity a color mixing activity as well as a fine motor activity, so we added two colors to each bag.
4. Once the paint is in the bag, you might like to tape the bag closed to secure. The last thing you want is little people opening the bags and spilling paint everywhere. My girls are older now and know not to open the bags, so I haven’t taped these ones!
I definitely recommend taping the bags though and supervising carefully throughout the activity to avoid any paint spills and damage to clothing and furniture.
Advertisements
5. Once the paint is safely in the bag, squish it with your fingers. The idea is to both mix the colors together and keep the paint within the outlines of the leaves. This can be a little tricky for small children, especially when you are trying to mix the color evenly at the same time! See how you go!
Advertisements
My girls really love this type of activity, and I love it because it’s relatively mess free! They get to use paint, which they really enjoy, and the paint stays in the bag for a quick and easy clean up!
Advertisements
Have you seen this craft on my Instagram? These are leaves that we collected from our neighbors oak tree and colored with oil pastels. It looks much better over on Insta, but this is fun too if you are looking for a quick prep activity!
Advertisements
Advertisements
And I nearly forgot to include these FREE printables! Enjoy! Jacinta Xx.
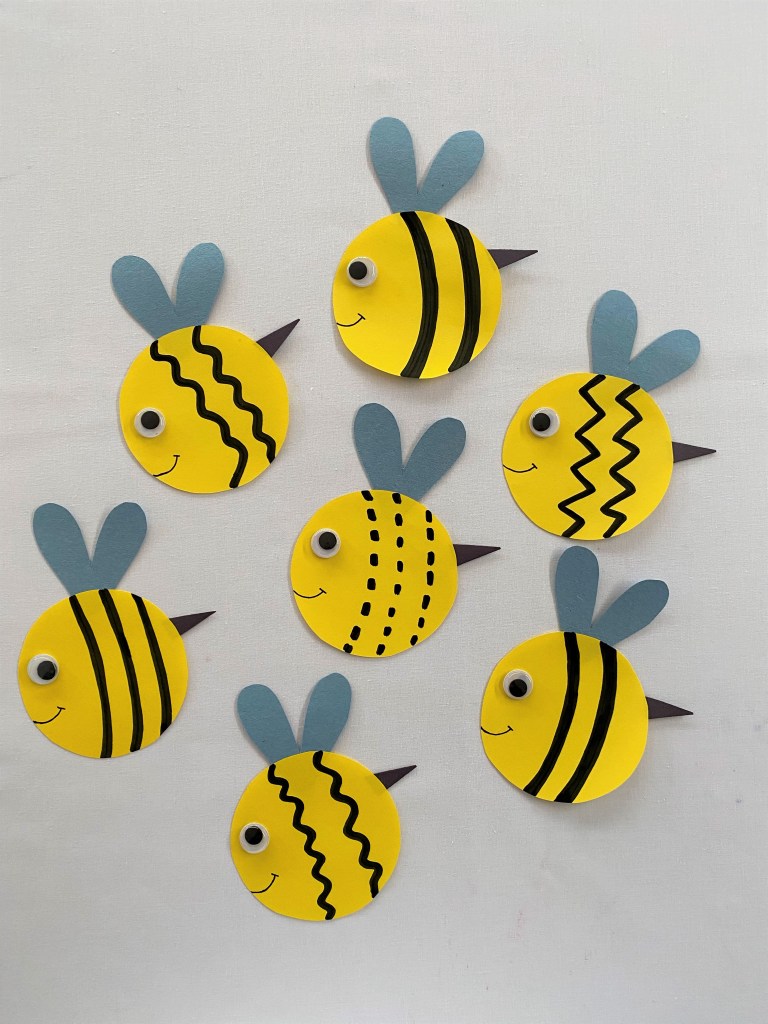
This scissor skill activity is one of my favorites. The bees are super easy to put together, and are a great tool for developing scissor skills in kids. And if you don’t like the idea of cutting through the adorable bees, I have included a FREE printable for you that doesn’t involve snipping through any of these cute little guys.
This is what you will need:
Colored construction paper
Pencil
Scissors
Glue stick or tape
Black marker pen
Googly eyes
!WARNING! Remember that scissors are sharp. Adults should always closely supervise children when they are using scissors.
This is what you will need to do:
1. Trace a circle shape onto the yellow paper with pencil. You might like to go on a shape hunt around your home to find the perfect size circle to trace. Think drinking glasses or cups, small containers and side plates.
2. Next, cut the circles out with scissors.
3. Cut some wings for your bees from light blue paper. I drew little heart shapes and then cut them out. While you have the scissors out, cut a small triangle shaped stinger from black paper.
4. Attach the wings and the stinger to the back of the bees with tape or glue.
5. Turn the bees over and draw line patterns on the bees with black marker pen. Try drawing dotted lines, zig-zag and curly lines. Finish your bees with a smiley face and glue down a googly eye.
6. Now you are ready to start cutting! Cut carefully along the lines with scissors.
If you don’t like the idea of cutting through the bees, here is another fun scissor skill activity for you.
And if you would like read to more about developing scissor skills in your children, have a look at the post I published a couple of days ago. There are so many ideas there for you. Thanks for reading! Jacinta Xx