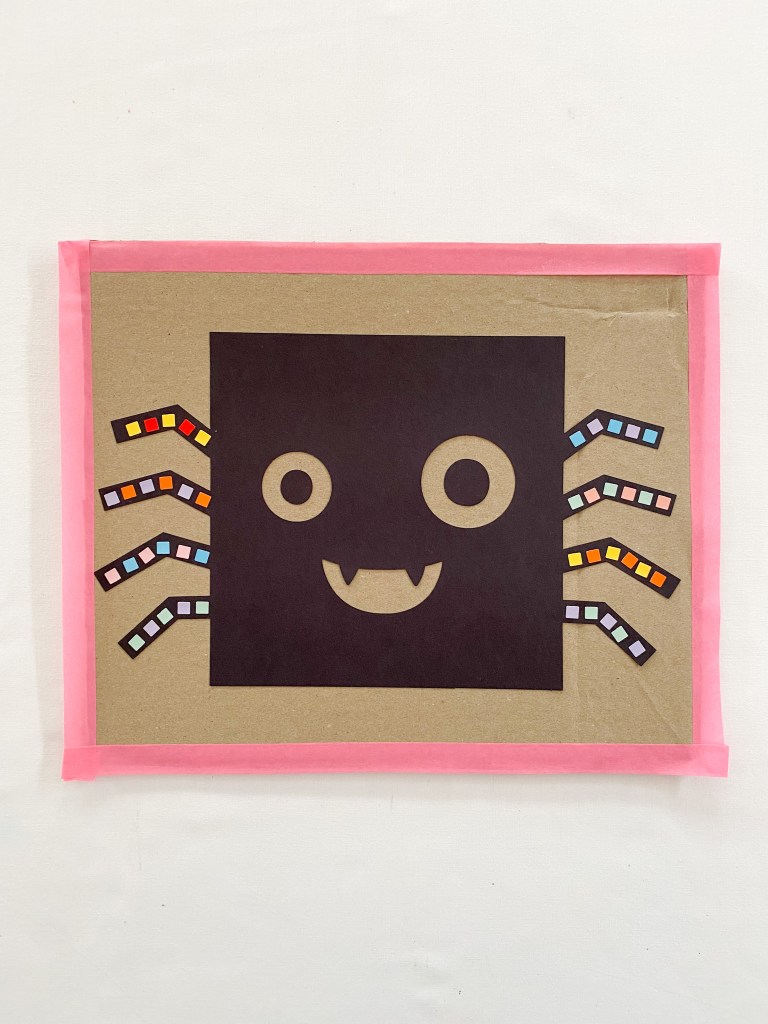
This cute spider activity is perfect for helping kids learn about shapes and patterns this Halloween! Simply print out the templates below, snip the shapes carefully with scissors and then paste them onto the spider legs to continue the patterns. This activity is great for developing early numeracy skills, scissor skills and fine motor skills. And it’s heaps of fun too!
Advertisements
This is what you will need
Construction paper
Scissors
Recycled cardboard
Glue stick
Stickers
Washi tape (optional)
Advertisements
This is what you will need to do
1. Cut a spider shape from black construction paper and glue it down onto a piece of recycled cardboard. Add some stickers to start a pattern. Your pattern could be simple alternating patterns or more complicated ones that involve 3 or more colors or shapes. You might also like to add a border of washi tape to finish your game.
Advertisements
2. Next ask your child to finish the patterns with their stickers. We used small square stickers, simply because that’s what we had on hand. You could use sticker dots or even paints and Q-tips to finish the patterns.
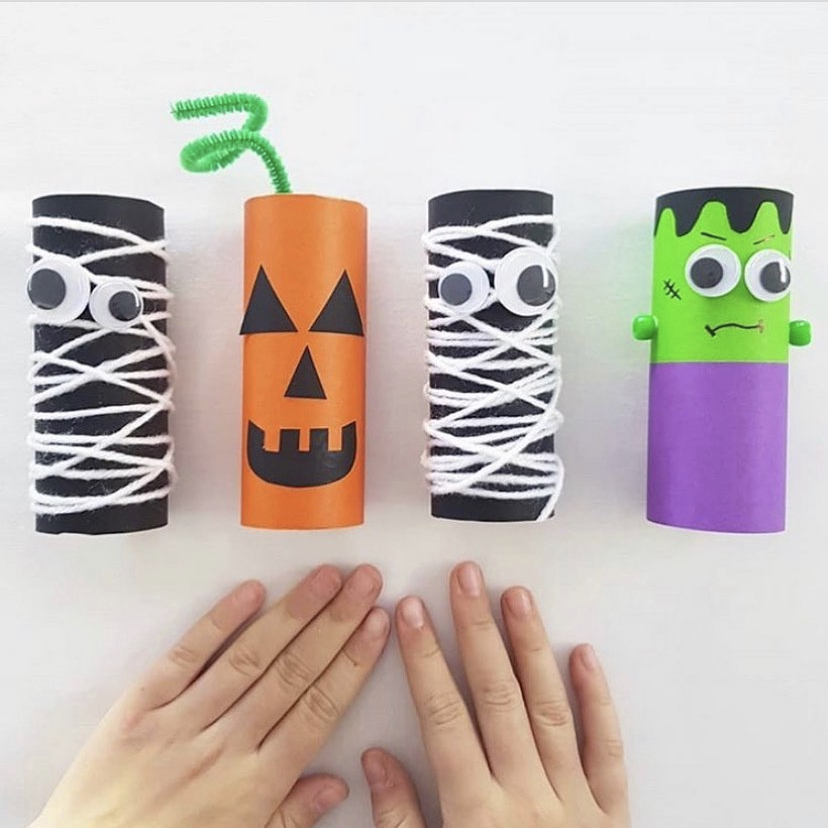
I love Halloween crafts so much! I think that one of the main reasons why they are so fun is that you get to use googly eyes – lots of them. Googly eyes make your monsters, ghosts and ghouls look Halloween spooky, but also kind of cute. If you don’t have googly eyes at home for your Halloween crafts, then this FREE printable worksheet might be perfect for you.
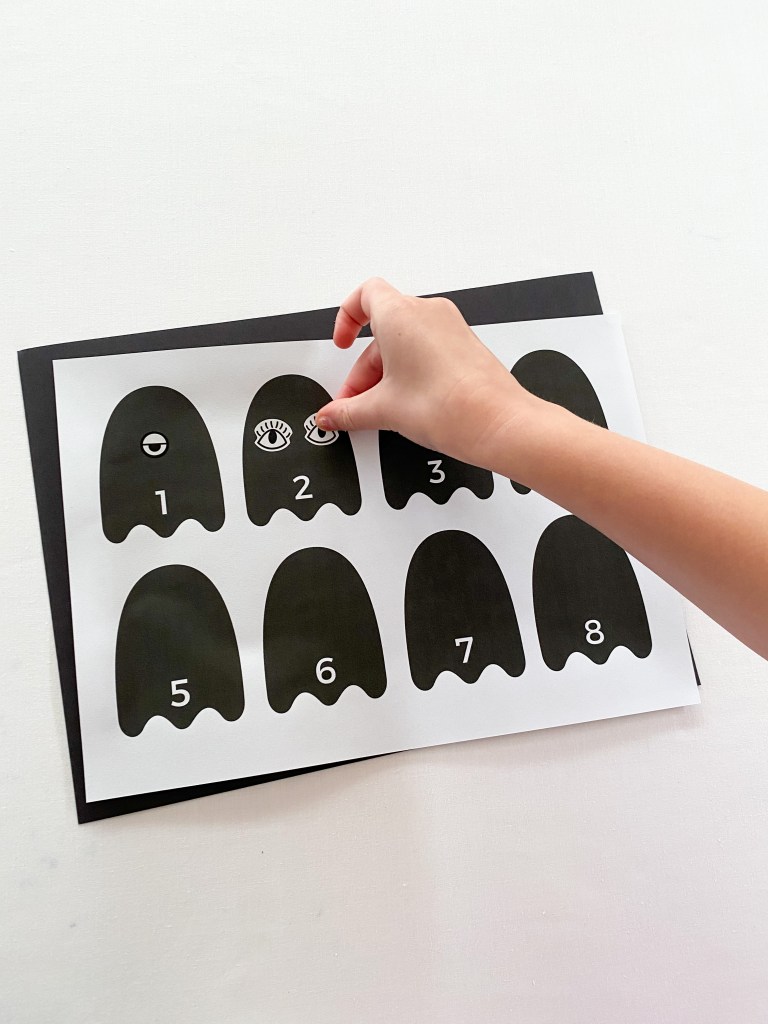
I posted this activity over on my Instagram last night and it has been super popular! It’s a quick, low-prep math activity that is perfect for developing early numeracy skills. Simply print the file below and play!
Halloween is fast approaching and my kids are getting super excited! Even though the holiday will look a bit different this year and trick or treating probably wont be happening where we live – I am still determined to make it as fun as possible.
These three activities are super easy to set up and lots of fun to play. They each use clear sticky contact – the type that you would cover school books with. Clear contact is such a fun craft material! I always have some on hand at home.
Please note that the materials list in this post contain referral links!
Advertisements
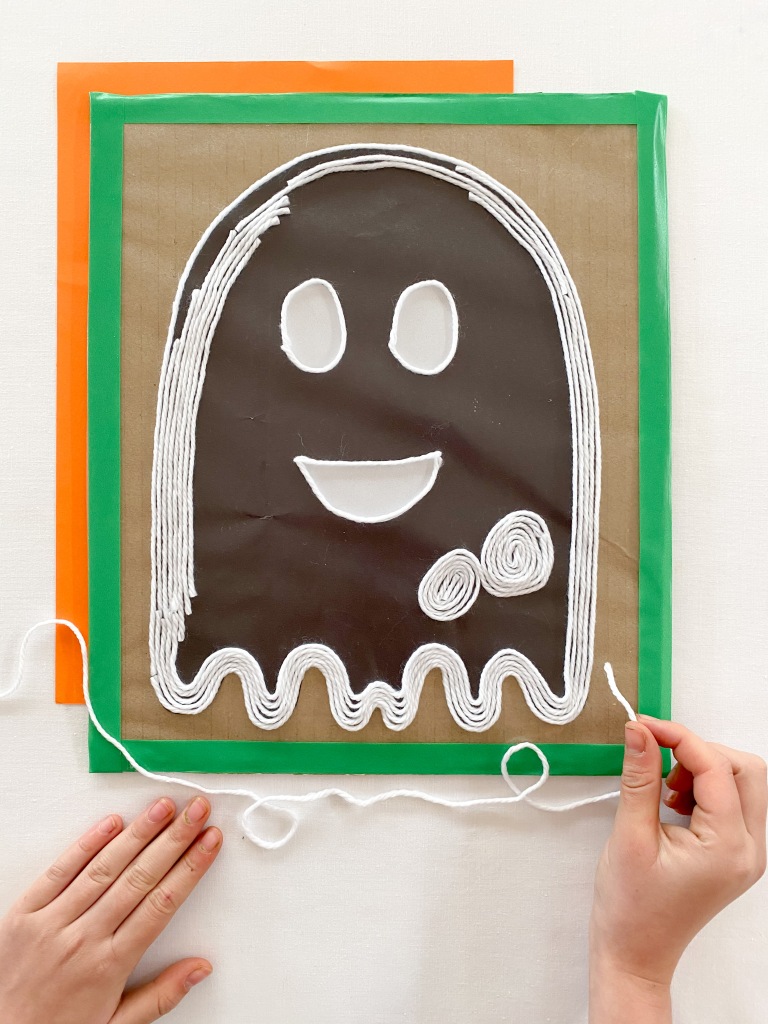
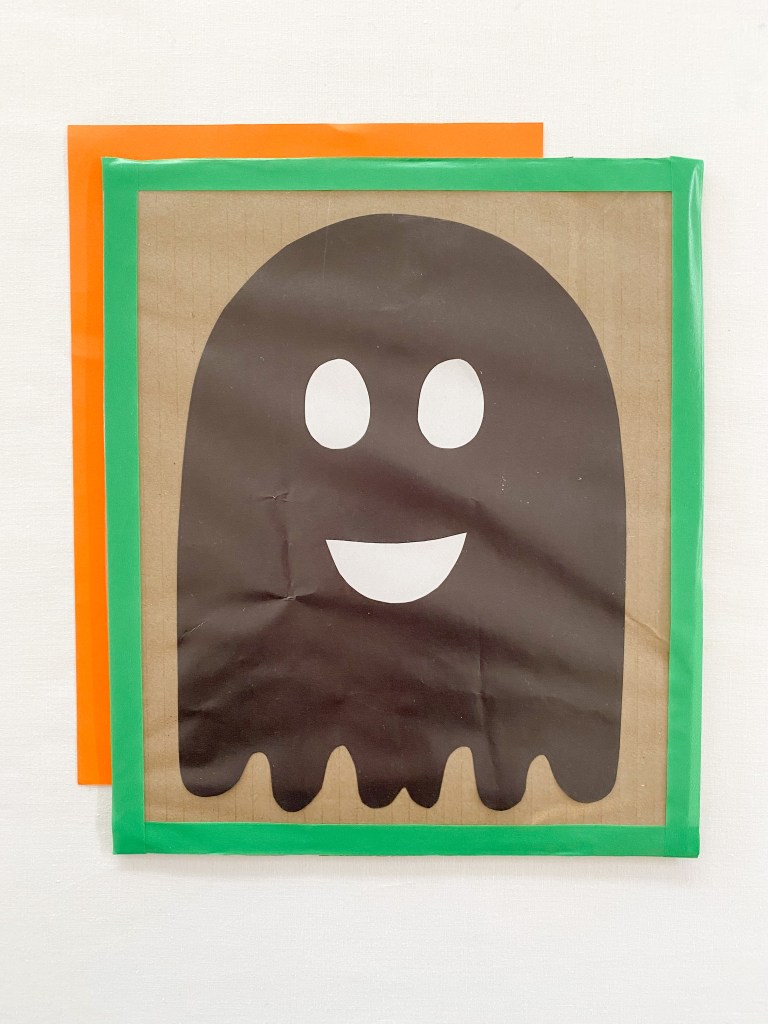
The first sticky contact activity that I want to share with you is this ghostly yarn art activity.
1. Place your cardboard on a flat surface. Draw a ghost on some black construction paper and glue it to the cardboard. Cut some eyes and a mouth from the white construction paper and paste down these pieces too! Cover the cardboard with clear contact – sticky side up. You may like to decorate your cardboard with a strip of colored washi tape to finish.
2. Cut a piece of white yarn and stick it down to the contact. You can start covering your ghost anywhere that you like. We started tracing around the edge of our ghost picture.
3. Keep sticking down the yarn until you have covered your entire ghost. The neat thing about this activity is that you can be as creative as you like with how you stick down the yarn. You might like to add long, straight lengths of yarn or you may like to swirl your yarn pieces.
4. And if you have younger children, you might like to use cotton balls to stick to your ghost. They work really well too and look great!
Advertisements
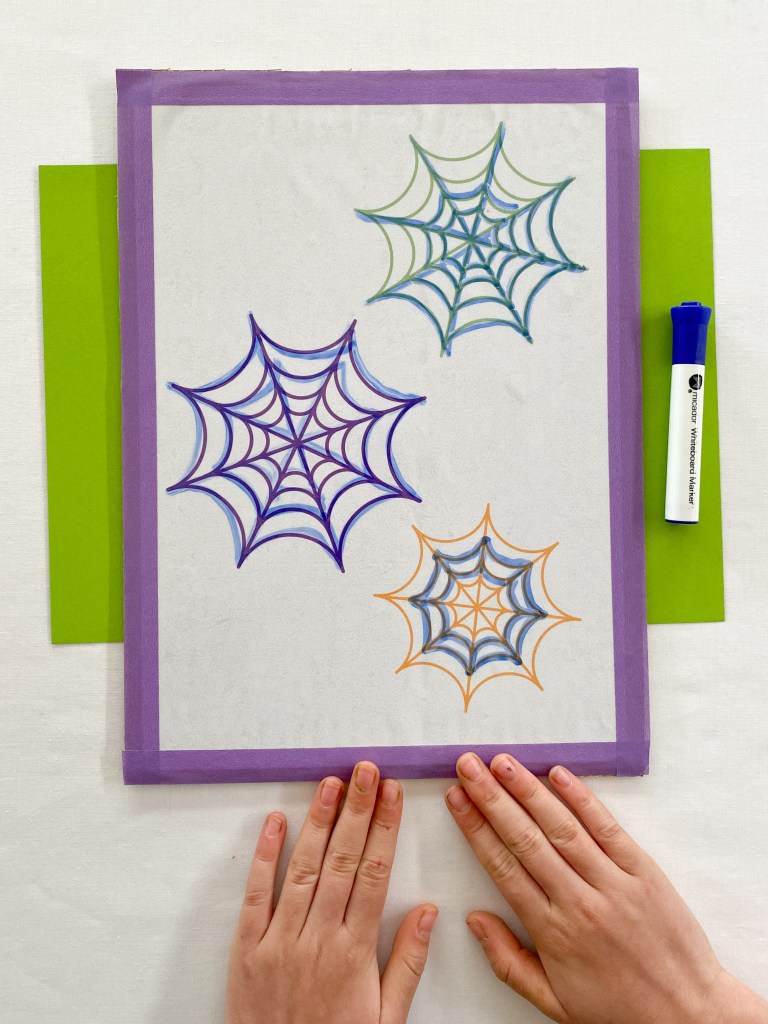
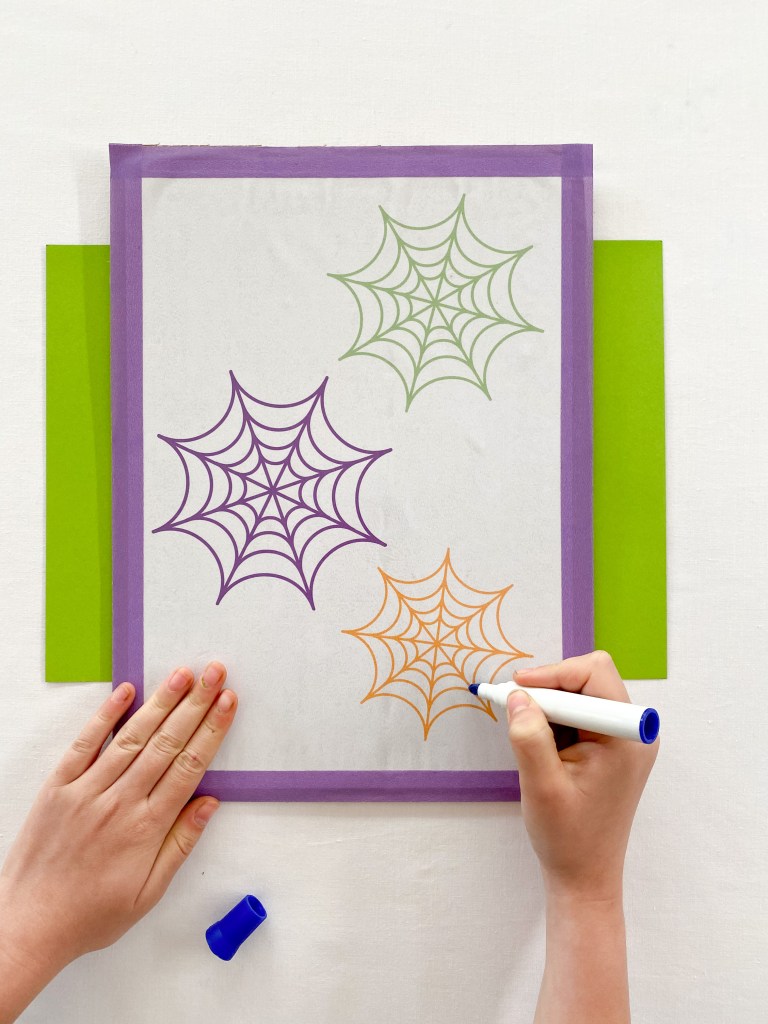
The next activity I want to share with you is this fun erasable tracing board. This activity is great for developing fine motor skills and once you’ve made it, can be used over and over again! It’s a great way to save paper!
Here is what you will need:
Recycled Cardboard
Spider Web Printable (See step 1)
Clear Contact
Erasable Marker pens
Paper Towel
Here is what you will need to do:
1. Start by printing the PDF attached below and paste it to a piece of cardboard. Once the glue is dry, cover the printed sheet with clear contact. For this activity, you will stick the contact down as you would normally cover a book. You may like to finish the board with a washi tape boarder.
2. Now trace away! Grab a dry erase or white board marker and start tracing!
3. Once you have finished tracing, simply grab some paper towel and wipe the marker away. Then you can start tracing again!
Advertisements
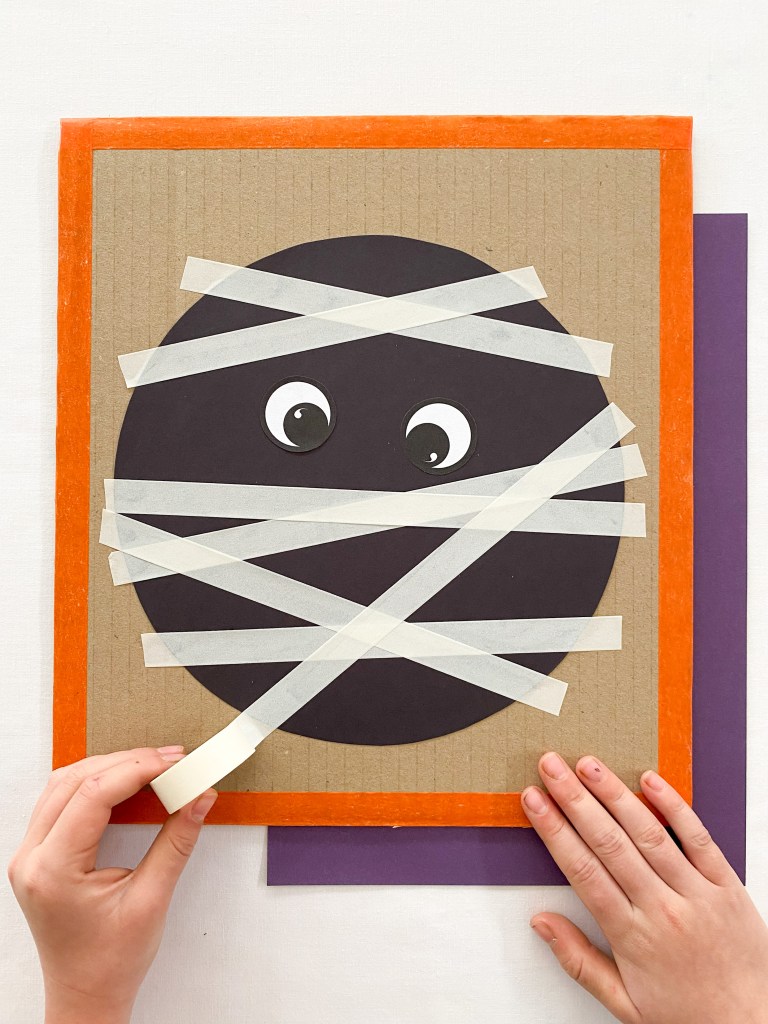
The final activity that I want to share with you is this fun sticky mummy activity! This is such fun, and best of all, you only need a few simple materials to make one.
This is what you will need:
A piece of recycled cardboard
Black construction paper
Glue stick
Clear Contact
Scissors
White washi tape
This is what you will need to do:
1. Trace a circle shape onto black construction paper and paste the circle onto the piece of cardboard. Add some big eyes to the center of your circle. Cover the entire board with clear contact, smoothing any bubbles out with your fingers as you go. You may like to decorate the boarder of your cardboard with a strip of washi tape.
If you like, you can use this Mummy picture instead of drawing your own:
2. Next, grab your roll of washi tape and start adding strips to your mummy. Each of these strips that you add will represent the mummies bandages. You can either tear lengths of tape straight from the roll and attach to the board, or use your scissors to neatly snip. It’s up to you. Both ways will look great!
3. Once you have finished your Mummy, you can remove the tape from the clear contact. You probably won’t be able to use the tape again, but you will be able to reuse the board.
Advertisements
I hope that you have enjoyed reading this article and find it useful this Halloween holiday! Jacinta Xx
Halloween is the perfect holiday for practicing scissor skills! I have heaps of fun ideas that will have your kids perfecting their scissor skills in no time. Best of all, you will only require a couple of inexpensive and simple materials – and these activities are FUN!
Keep reading, you will find a FREE printable at the end of this article that will make practicing scissor skills with your kids and students a breeze!
Advertisements
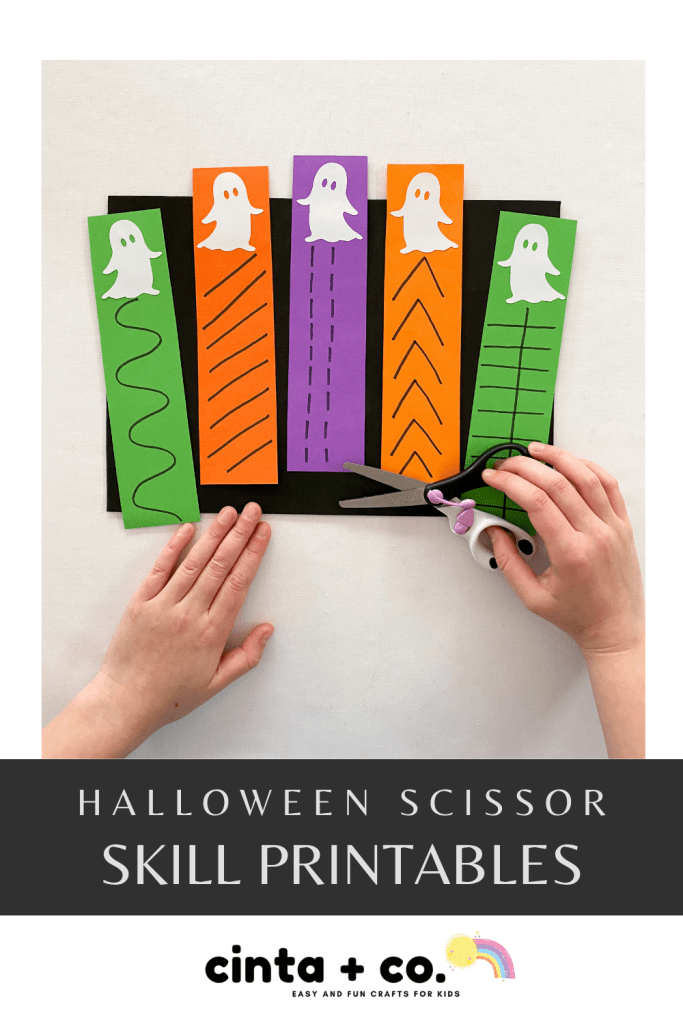
Below is my favorite and most simple scissor skill activity. To play this one, you will only need some strips of paper, a marker pen and of course, some scissors. For this activity, we used specialized children’s scissors.
Children’s scissors are great for learning how to snip and cut. They are the correct size for little hands (so they are not too heavy or too big, which helps with accuracy of cutting), they have a real safety blade that actually cuts (plastic scissors often fold paper rather than cut through it, making them frustrating for little kids to use) and have that little spring lever connecting the two handle pieces together. This spring is fabulous! The reason being, that kids only have to get their hands working in the one direction to close the scissors, then the scissors spring back open on their own. This makes using scissors so much easier for preschoolers.
!CAUTION! Remember to always carefully and closely supervise your children when using scissors!
To put this activity together, all you need to do is cut some strips of paper, label them with a variety of lines using a marker pen, and then if you like, add a little ghost to each end of the strips. I used my Cricut Maker to cut the ghosts out and then pasted them down. You could simply draw them out or use a Halloween themed sticker if you have one. Then ask your children to cut along the lines in the direction towards the ghosts. You can make your lines as easy or tricky as you like – depending on your child’s skill level.
Advertisements
I posted the below activity on my Instagram earlier this week. I have to be honest and say that I don’t really love the pictures (I have almost deleted them at least 10 times! ha ha!), but I do really LOVE the idea of the activity. It’s a fun variation on the above idea, and is a great and easy way to practice scissor use!
For this next activity, I simply cut out the ghost shapes on white printer paper, drew some lines on the ghost tails with black marker pen, and then we cut along the lines with scissors. Again, this activity allows practice of cutting in a specific direction. You may notice that these scissors are different to the ones pictured above. They are still children’s scissors, but they have a sharper point (compared to the safer, blunt tip scissors above) and are a little heavier. These scissors are good for children who have some experience using scissors.
This final ghost cutting activity is one of my favorites! Again, draw and cut a ghost shape onto white printer paper and make snips along the tail. Then for some extra fine motor practice, take a pen or a pencil and roll the snips of paper towards the body of the ghost. Then once you reach the body, remove the pencil and you will see that the paper has curled. These curly tail ghosts are just the cutest!
If you have younger children, you might want to use cardstock to use in these cutting activities. Cardstock is a little less flimsy than printer paper, making it easier for kids to handle and cut.
Advertisements
Thanks so much for reading! I hope that you find these activities helpful these Halloween holidays! Jacinta Xx
Here are some fun printables for you to practice those scissors skills: