Here is another fun and easy scissor skill activity for kids this Christmas. You can make your own cute Santa from a painted paper plate and some strips of paper, or you can print out my FREE printable worksheets below.
Advertisements
This is what you will need to do:
1. Carefully cut some strips of paper. Remember that scissors are sharp and that you should always take care when using scissors!
Advertisements
2. Paint a paper plate in the skin color of your choice. This plate will form Santa’s face. Once the paint is dry, use a glue stick to paste the strips of paper onto the plate.
Advertisements
3. Cut a Santa hat and red nose from red colored construction paper.
Advertisements
4. Glue the hat and nose onto the plate, and add some eyes.
Advertisements
5. Take a pencil and curl Santa’s beard. This step is super fun.
Advertisements
6. Glue some cotton balls onto Santa’s hat to finish.
I thought that I would share this fun scissor skill activity with you. It is super simple to set up and only requires really simple materials – things that I am sure that you will already have at home!
PS: It feels like ages since I have had a chance to sit down and write a blog post. Life has been crazy lately – good crazy though!
!WARNING: Scissors are sharp. Adults must ALWAYS closely supervise children when they are using scissors.
Advertisements
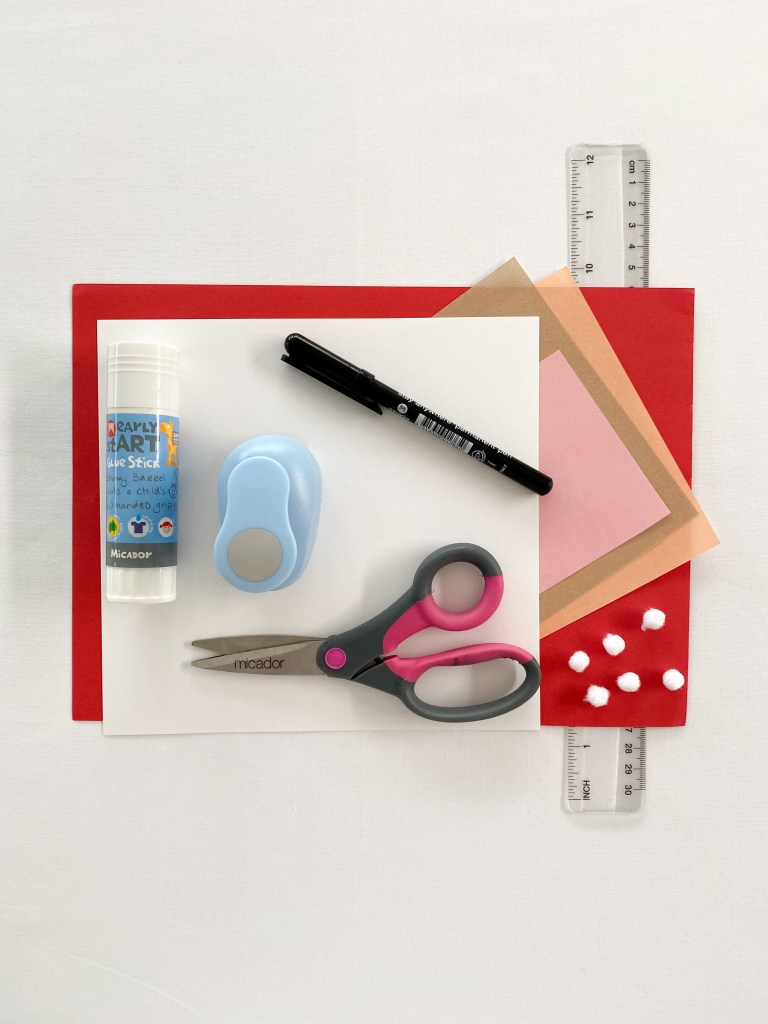
This is what you will need:
White paper or cardstock
Pencil
Ruler
Scissors
Off cuts of red and skin colored paper
Hole punch
Glue stick or white school glue
Black marker pen
Small white pom poms
Advertisements
This is what you will need to do:
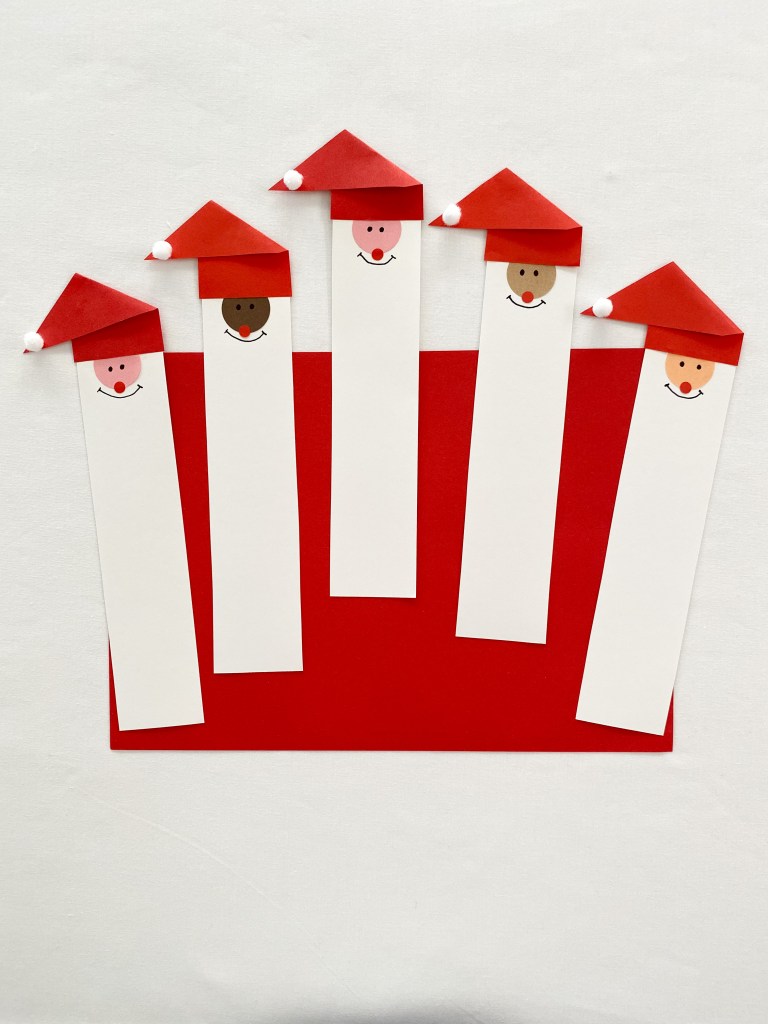
1. Take your piece of white paper or cardstock and rule lines along the length of the paper. Our lines have been rules approximately 5 cm apart – but you can make your lines any width that you would like.
Advertisements
2. Carefully cut along the lines with scissors to make your strips of paper.
Advertisements
3. Take your hole punch and make circles in different skin tone colored paper. Glue the circles onto the white paper. I positioned our circles so that they overlapped the cardstock edge. Simply fold over the excess paper and glue down to secure.
Advertisements
4. Next, cut some little hat shapes from red paper.
Advertisements
5. Take your glue stick and attach the hats to the very edge of the paper strips.
Advertisements
6. Glue down some pom poms to the ends of the hat and draw happy faces onto each Santa with black marker pen.
Advertisements
7. Using your black marker pen, draw a series of lines along each strip of paper. You can be as creative as you like with the lines that you choose to draw. I have mixed up a series of short lines and long lines. Then, carefully cut along the lines with scissors.
Advertisements
Thank you so much for reading! Jacinta Xx
Advertisements
Here is the Santa Claus Scissor Skills Worksheet for you!
I really love the lead up to Christmas and the holidays. It is honestly my most favorite time of the year! I love how excited our kids get, and how they count down the days until the 25th of December.
We always have a couple of Advent calendar countdowns on the go in our house each December. This year, the girls and I decided to make some of our own! And they are so cute, I thought that I would share them with you. They are similar to popular ones circulating Facebook and Pinterest, but we have put our own little spin on each! I really hope that you enjoy them!
Advertisements
To make the Santa Christmas Countdown you will need:
A copy of the free printable (scroll down to the end of this article)
White school glue (or any other glue that you already have at home)
Cotton balls
Advertisements
To make the Santa Christmas Countdown you will need to:
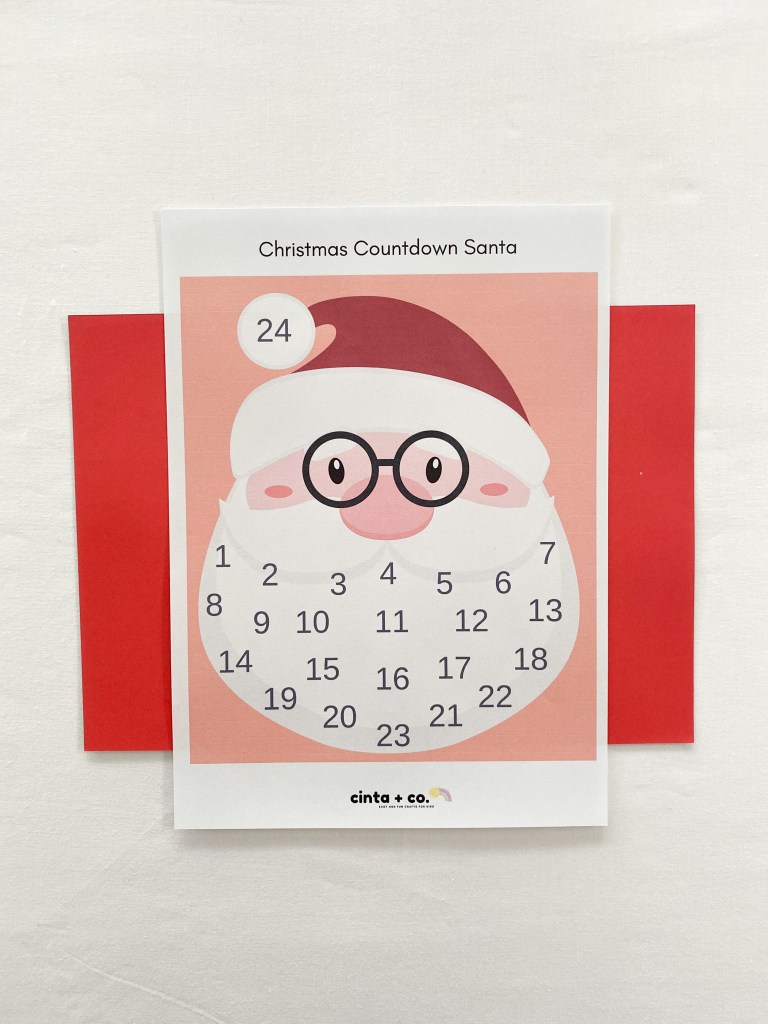
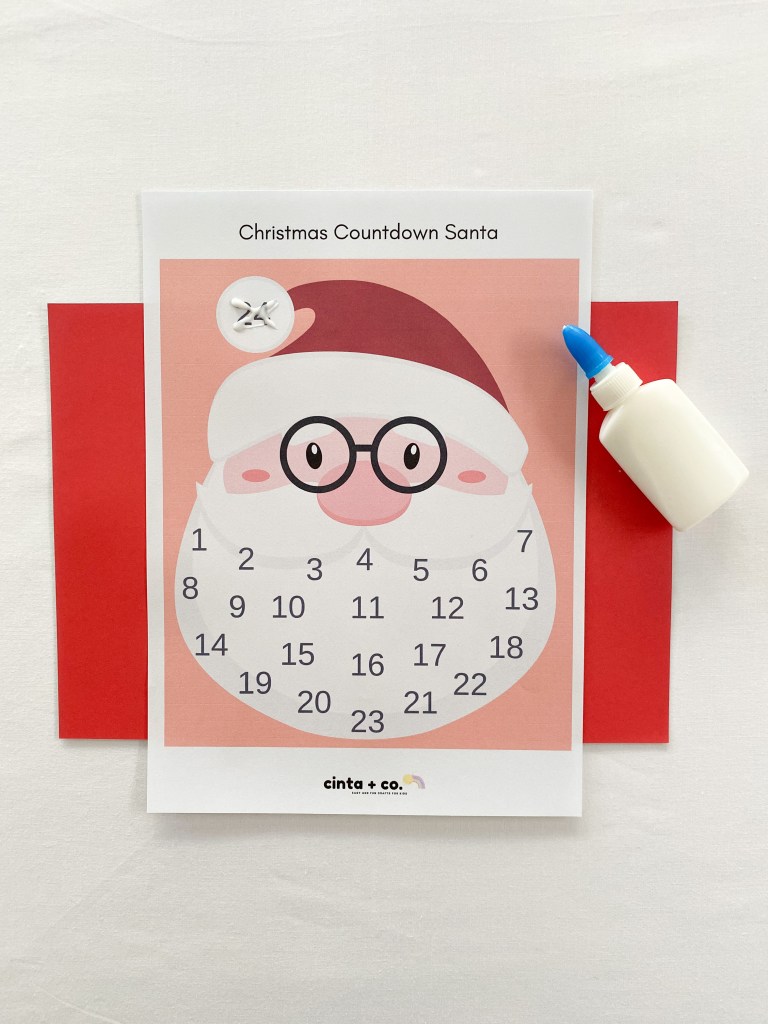
1. Print a copy of the free Santa Countdown File.
2. Start your countdown on the 1st of December. Locate the number 24 (Hint: 24 is located on Santa’s hat!). Place some glue on the number 24 and press a cotton ball into the glue to secure.
Advertisements
3. Continue to glue a single cotton ball down each day to make Santa’s beard.
Advertisements
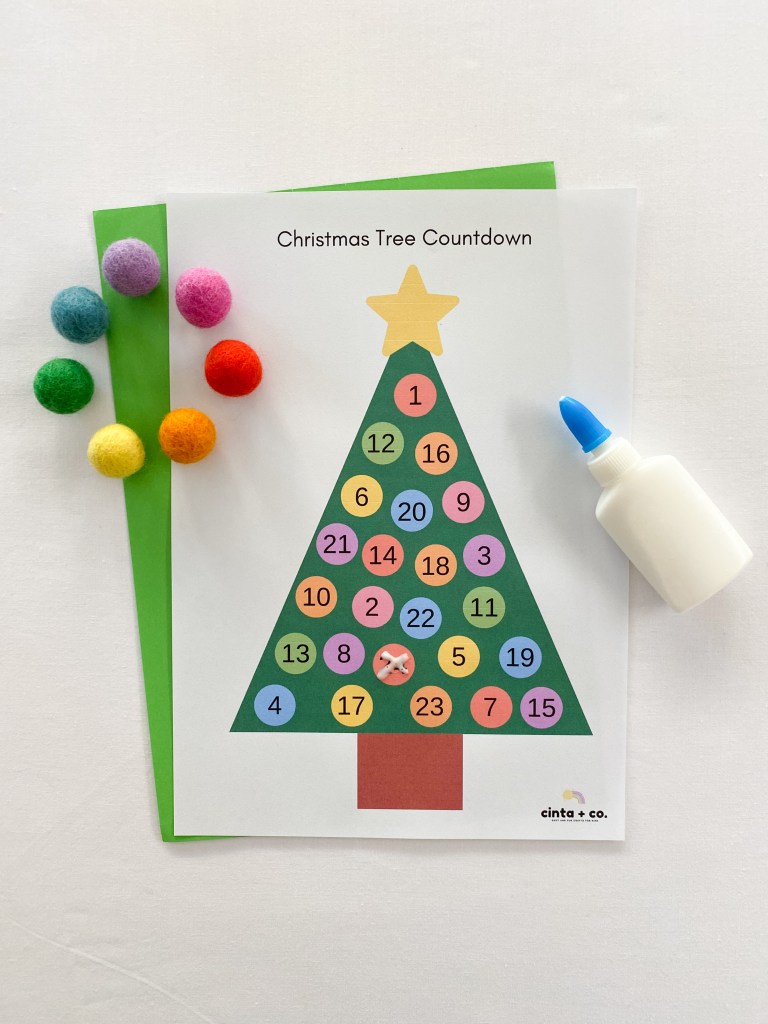
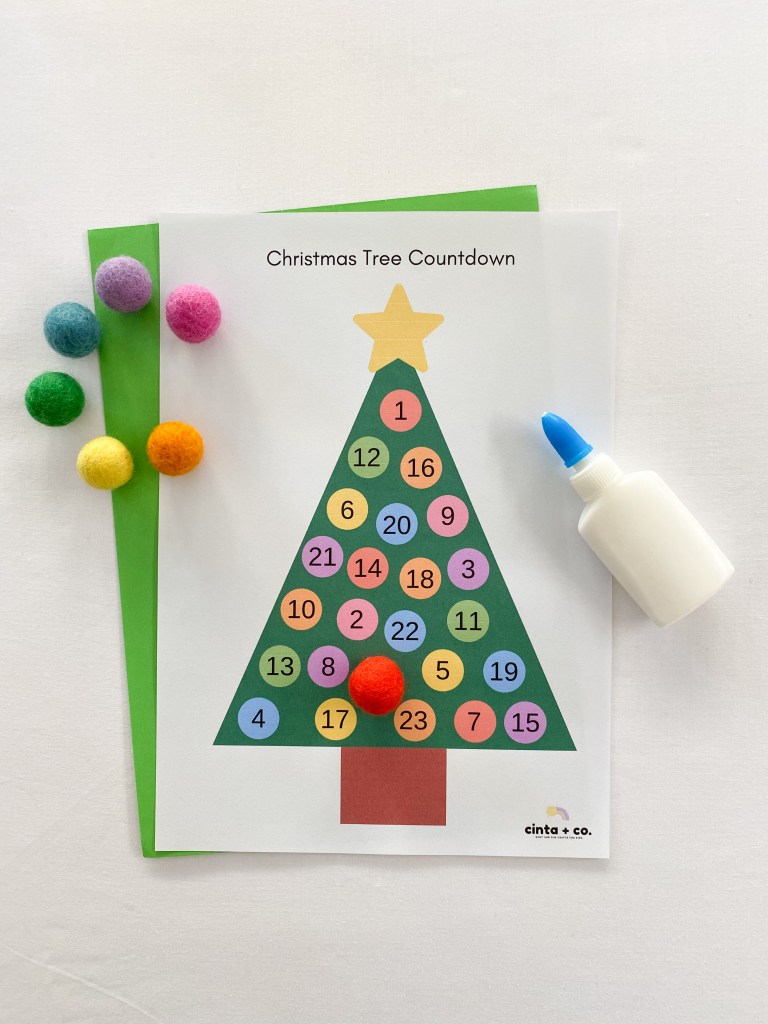
To make the Christmas Tree Countdown you will need:
A copy of the free Christmas Tree Countdown printable. (Scroll down to find it).
Pom poms
White school glue
Advertisements
To make the Christmas Tree Countdown you will need to:
1. Print a copy of the free Christmas Tree Countdown printable worksheet.
2. Start your countdown on the 1st of December. Locate the number 24 and place a drop of on the number. Press a pom pom into the glue to secure. You might like to match the pom pom color to the color of the circle for each day.
Advertisements
3. Continue to glue a single pom pom down each day to decorate the tree.
Advertisements
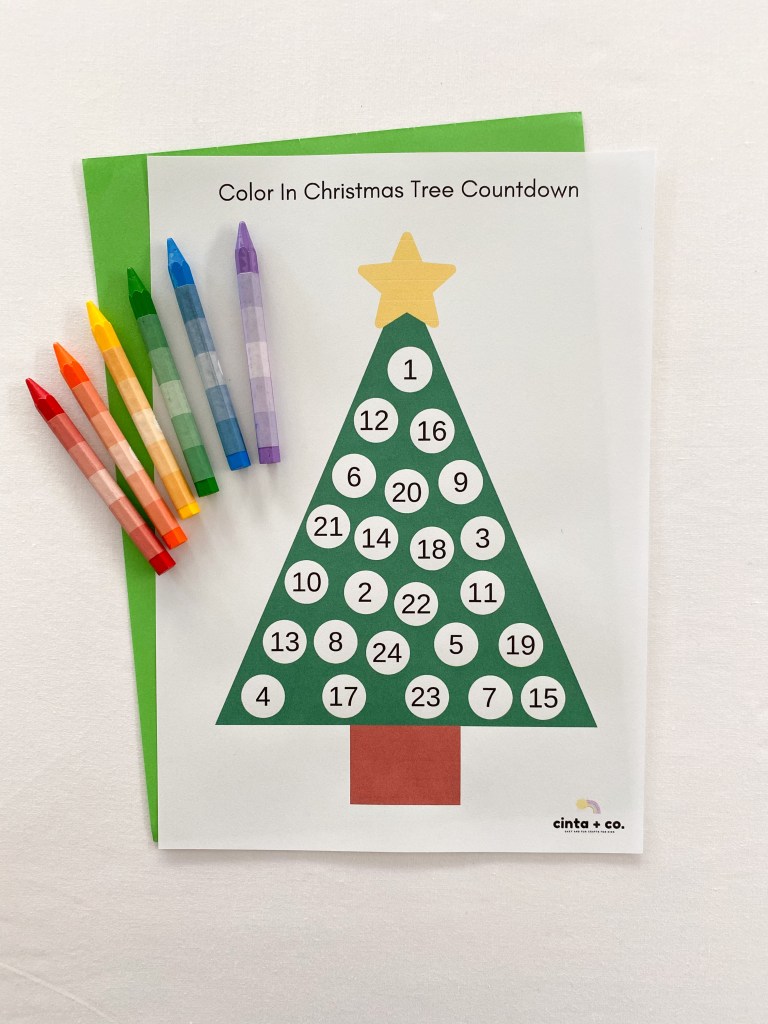
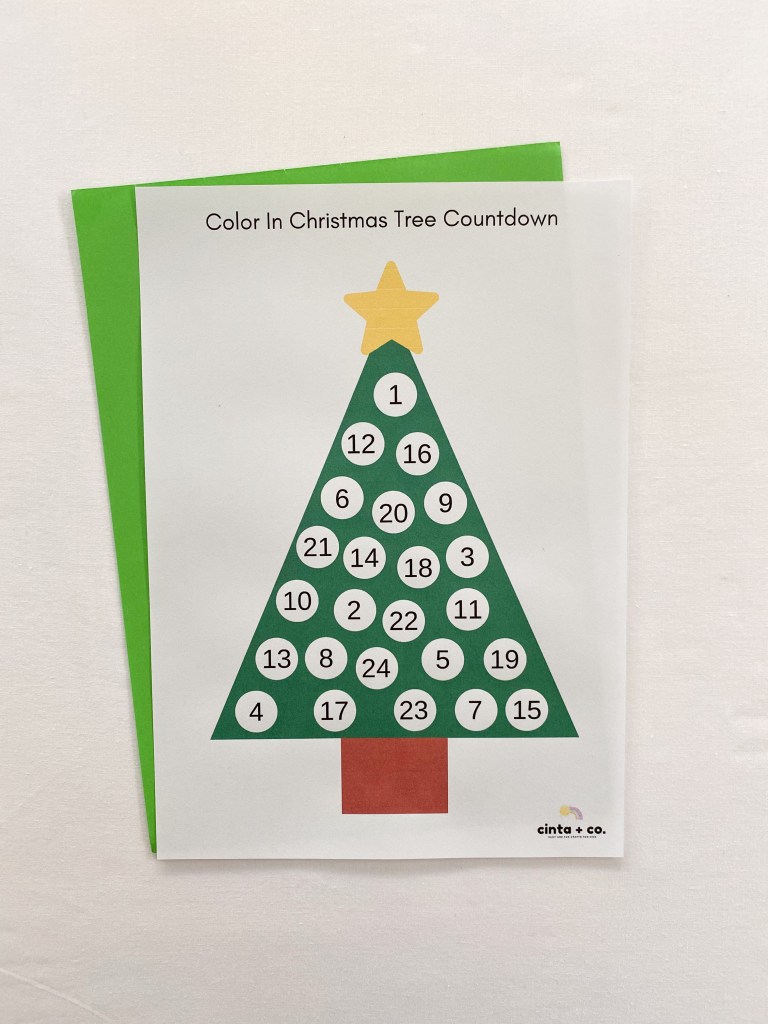
To make the Color In Christmas Tree Countdown you will need:
A copy of the free Color In Christmas Tree printable (scroll down to the end of this article)
Colored crayons, pencils or marker pens
Advertisements
To make the Color In Christmas Tree Countdown you will need to:
1. Print a copy of the free Color In Christmas Tree Countdown printable worksheet.
2. Start your countdown on the 1st of December. Locate the number 24 and color the circle with a brightly colored crayon, pencil or marker pen.
3. Continue to color a single circle each day to decorate the tree.
This fun activity is perfect to make in the lead up to these holidays. It’s great for developing color recognition, counting and fine motor skills. And the fact that it is made from recycled and easily accessible materials also means that it is inexpensive to set up!
Advertisements
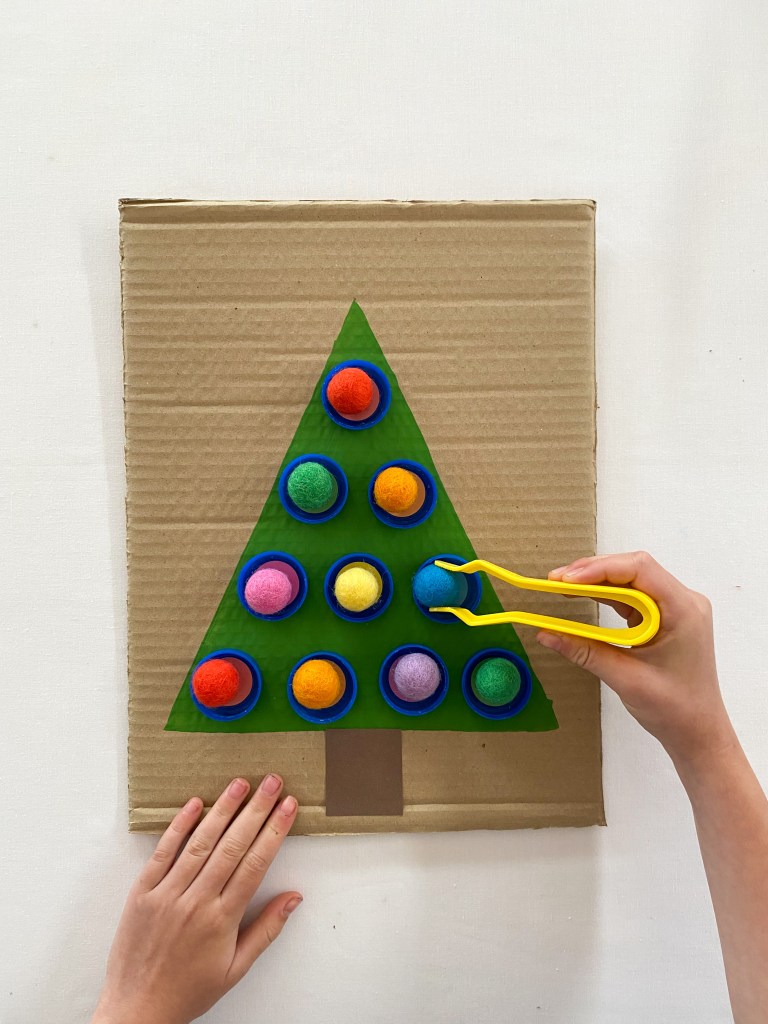
This is what you will need:
A piece of recycled cardboard
Pencil
Ruler
Green paint
Glue – I used white school (PVA) glue
Recycled bottle tops – I used milk bottle tops
Circle stickers
Pom poms
Tweezer or tongs
Advertisements
This is what you will need to do:
1. Cut a piece of recycled cardboard to size. You can use any size piece of cardboard that you like. Use a pencil and ruler to draw a triangle shape and then paint it green. You might also like to paint a star on the top of your tree. I wish that I had! If you do not have green paint, you can always use crayons, marker pens or even pencils.
Advertisements
2. Once your green paint is dry, glue down the bottle tops onto the tree. I lined our bottle tops up in rows, but feel free to spread them across your tree in any pattern that you like.
Advertisements
3. Label the bottle tops with some colored circle stickers. If you do not have circle stickers, you could always cut some small circles from colored paper and glue them down instead.
Advertisements
4. Match the pom poms to the bottle tops. Repeat and play over and over again. We used tweezers to transfer the pom poms to the bottle tops – this is great for developing fine motor skills – but feel free to use fingers, a peg or any other tongs that you might have at home!
Advertisements
I hope that you enjoy this activity! Let me know how you find it! Jacinta Xx
If you are unable to make one of these Christmas trees yourself or if you would like a quick alternative, try this fun, FREE printable version of the game.
And here are a couple more FREE holiday printable worksheets for you! There is a match the upper and lower case letter game, a count and color game and, a find and color the shapes game!